Thursday, 4 June 2015

The best of both adapter worlds with the £12-80, 1000 TV lines, colour TV camera

Today, I removed the sliding IR cut/ plain glass filters from the lens holder and re-attached the lens threads to the circuit board.


There is a small spring-loaded arm activated by the brightness of the light that slides the IR cut filter in front of the sensor in bright light, and slides the plain glass filter in front of the sensor in dim light.


With both of these removed, the lens threads were then re-attached to the circuit board beneath the C/CS thread aperture:


This allows for either a webcam adapter or a C/CS adapter (1.25" OR 2") to be used with the camera.

Back view

Side view

The box with the power/signal cable

Being a colour camera, it is most suited to lunar and planetary imaging. An IR cut filter is required if a scope other than a Newtonian is used because visible and IR light come to slightly different foci and produce a soft focus if an IR cut filter isn't used with a refractor. The original IR filter can be left in place if the filter slider is disabled.

I do however, intend to remount the circuit board in a smaller, black project box to produce a neater finished camera.

Click on Older Posts to see more of this blog

Results with a £12-80, 1000 TV lines board video camera and a capture card

The mounted board camera was placed at the prime focus of a cheap 80mm refractor. The camera was fitted with a 1.25" UV/IR cut filter (without this filter the image had a very soft focus because the IR and the visible came to focus at different points). The scope was mounted on a Merlin AZ tracking mount.


The camera was connected to a 12 volt power supply and a USB capture card, which was connected to the computer.


SharpCap was used to control the output from the camera and to capture two overlapping, 1000 frame  AVIs of the 98% waning, gibbous Moon at 640 x 480 resolution. The AVIs were stacked and wavelet processed in Registax 5. The two resulting images were merged into a single image and post processed in Photoshop.


Capturing the AVIs at 640 x 480 resolution results in the images being of the correct aspect ratio.


Click on Older Posts to see more of this blog.

Tuesday, 2 June 2015

Further experiments with a £12-80, 1000 line circuit board TV camera.

Nicola Mackin's Aspect Ratio Converter can scale the image up or down during correction:
Read more about Aspect Ration conversion HERE.
Original, uncorrected image of the wrong aspect ratio:

Image scaled up during correction:

Image scaled down during correction:

Remounting the board camera in a project box.

I decided to mount the camera without any of the lens housing, and with a C/CS mount on the outside of the project box. The advantage of this is that a 2" adapter can be used if required, and the chip is unfiltered. The disadvantage is that the chip is more exposed, and with a project box that is not black, light can enter through the walls of the box. This is not usually a problem as vastly more light comes from the subject than through the box walls.
The circuit board camera

The lens assembly showing the multi-element lens and the IR cut filter at the bottom of the lens thread.
If a webcam adapter was to be used, then the square filter could be removed from the bottom of the lens thread. In either case, an IR/UV cut filter ac be attached to the adapter, if a filter is required.

Mounted board showing the sensor


A plug keeps dust off the sensor

A C/CS telescope adapter attached, with a dust cover on the front
Note that the camera case is actually grey, but the flash has made it appear to be white.

Using a two inch adapter

This camera works fine with a USB capture card, which effectively turns it into a powered USB camera.

Under Windows 8.1, this USB capture card works fine. New cards cost as little as £6 on Amazon.

Click on Older posts to see more of this blog

Saturday, 30 May 2015

Experiments with a low cost board video camera

I am looking into suitable, entry level astronomical imaging devices and am considering the merits of video TV board cameras. I located and obtained this device from Amazon:

The lens was removed and a standard webcam adapter was screwed in place of the lens. The camera, as yet unmounted was placed at the prime focus of a 127mm Maksutov scope:


The camera was powered by a 12 volt adapter and the composite video output was connected to a domestic DVD recorder, set to High Quality. A 7 inch TV monitor was connected to the output of the DVD recorder. Below is the live view from the monitor when the scope was aimed at, and tracked the Moon:


The video stream produced by the camera was recorded to a recordable DVD disk, and later, the BMP images were extracted from the VOB (video object files) on the disk using Ian Davies's VOB extractor software.
1500 video frames were stacked in Registax 5 to produce the following image, which was de-interlaced and post-processed in Photoshop:
The Aspect Ratios were corrected using Nicola Mackin's AR-Corrector software

Rupes altai, Mare Nectaris, craters Piccolomini, Catharina, Cyrillus and Theophilus

Aspect Ratio Corrected
Similarly, another two images were extracted from the DVD: 
Lunar Apennines

Aspect Ratio Corrected

Craters Herschel, Ptolomaeus, Alphonsus, Alpetragius, Arzachel, Albertegnius with Rupes Recta at the bottom of the image.

Aspect Ratio Corrected


More details will be put in this blog entry very soon. The camera will be mounted in a protective project box and more details will be posted on the resulting images.

Click on Older posts to see more of this blog

Friday, 18 January 2013

The Swan Nebula, M29 and M13 with a Samsung SDC-435 and a 6", f/5 Newtonian


The Swan or Omega Nebula, M17 with a 6," f/5 Newtonian
The SDC-435 was fitted with a light pollution filter

M29, Open cluster in Cygnus with a 6", f/5 Newtonian

M13, Globular cluster in Hercules with a 6", f/5 Newtonian

Click on Older Posts to see more of this blog

Thursday, 17 January 2013

SSNR3 Samsung noise reduction in the SDC-435


The SDC-435 has a built in noise reduction function that is intended to be used in low light environments. It is important to use this function, particularly if the camera is being used as an observation camera and the image on the TV monitor is to be observed.
Below are two individual captured frames to show the quality of the viewed image. One has SSNR3 turned off and the other has the function turned on. The two images were captured within minutes of each other. The camera was fitted with a light pollution filter and the telescope was an f/10, 11" SCT:

Noise Reduction OFF


Noise Reduction ON


The noise has been drastically reduced but the stars in the image remain unaffected.
For the production of images, dark-frame subtraction using dark-frame scaling removes the amp glow in the top left of the image.

M57 & M82 with the modified Samsung SDC-435 and an 11" SCT


The modified Samsung SDC-435 was used with slightly changed white balance values and noise reduction. The camera was fitted with a light-pollution filter and was placed at the prime focus of the 11" f/10 SCT. Dark-frame and image data were recorded to DVD in high quality. The BMP frames were recovered from the DVD with VOB Frame Extractor and the frames were stacked in Registax. The aspect ratios were corrected and levels were adjusted in the Gimp.


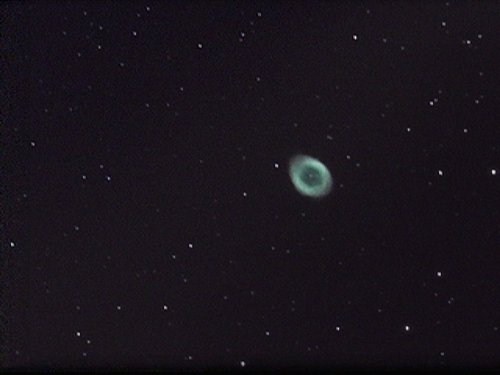
M57 the Ring Nebula


M82 the Cigar Galaxy


The white balance has been improved with the current settings.

Click on Older Posts to see more of this blog

Modifying the Samsung SDC-435 video camera for deep sky astronomy


It should be noted that the Samsung SCB-2000 is the same camera as the SDC-435, re-named by Samsung following company reorganisation.

Warning. Modifiying your camera will probably invalidate the warranty

Screws at the top and bottom of the camera housing are removed. This allows the top and bottom parts to be removed exposing the internal circuit boards.
The front board which houses the CCD and the blue filter it attached by small screws to the front metal housing of the camera. It is attached to the main circuit board that runs from the front to the back of the camera by two ribbon cables. These are gently detached and the screws holding the filter assembly are removed. The assembly is shown below. The camera is then re-assembled.

The filter assembly in place

Filter assembly

The exposed chip

The two screw holes can be seen through which the screws attaching the filter assembly passed.

These are the settings on the OSD to set the camera up for deep-sky observing


Changes to the White Balance produce the correct colour balance in the image. The settings were obtained by fitting a lens to the camera and adjusting the Red and Blue gain in daylight to produce an image with correct colours.
These settings work but the user should experiment.


I fitted a light-pollution filter on the camera and mounted it at the prime focus of the 11"SCT.
15min of DVD (1 Vob file) were captured at high quality and a similar amount of dark-frame data were recorded. There was a bright Moon in the sky.
The VOB Frame Extractor software coded by Ian Davies was used to extract BMP images from the DVD with no loss of quality.
Andrew Sprott’s Dark Frame Scaler program was used to correctly scale the raw darkframe produced by Registax.
The BMPs were dark-frame corrected and stacked in Registax. The resulting image was aspect-ratio corrected and cropped.
This is the resulting image with absolutely no colour manipulation:

M57


Click on Older Posts to see more of this blog

Using the Samsung SDC-435 (SCB-2000) video camera for astronomy

It has been a while since I wrote in this blog but I am back from my other projects. Previously I was exploring the Mintron series of cameras and some modifications that Mintron made to the cameras for me that gave them more capabilities as astronomical imagers.
I am now reporting on some experiments on using the Samsung SDC-435 (SCB-2000) frame-accumulating, colour video camera for deep sky imaging:

The camera:


I attached the camera to a 10" f/4.8 Newtonian reflector telescope and used Astrovideo to capture 100 frame AVIs with a 5s delay between the capture of individual frames. The sens was set to auto and max accumulation of 512. AGC was set to high and the camera was set to colour. A 100 frame dark-frame AVI was captured with fixed align with the cap on the front of the scope.

The camera adjusted automatically so that the dark-frame was far too light as discussed for Mintron Dark Frames in our article in ‘Popular Astronomy’ April-June 2010. Astrovideo also simultaneously tracked and summed the captured frames and produced an image that was saved as a .BMP file. This image was then used along with the dark-frame in Dark-Frame-Scaler to produce a corrected dark-frame for use with the AVI in Registax.

The first results are presented here rescaled from 640 x 480 to 500 x 375:

M13


M3:


M51


M64:


M57:


I needed to investigate camera settings to see whether the colour balance can be improved. The blueish tinted filter that filters out IR in front of the 1/3" chip will also cut down H-alpha to levels that could be below 20% of their actual values. I then modified the camera by removing this filter.
My intitial reaction was that this camera can be used for Deep Sky observing and imaging although the live views have a fair bit of colour noise.
.

Comet McNaught C2009/R1 with an Unmodified Samsung SDC-435 frame-accumulating video camera and an 11" F/10 SCT


June 21/22, 2010

Click on Older Posts to see more of this blog