Thursday 23 January 2020

The Orion nebula with an SV305 camera and AstroDMx Capture for Linux

Stack combination of 30 x 25s, 30 x 20s, 30 x 15s, 30 x 10s, 30 x 5s and 30 x 2s exposures plus matching dark-frames, of The Orion nebula with an SV305 camera with an SVBONY UV/IR cut filter, and a 130mm, f/5 Newtonian, captured with AstroDMx Capture for Linux. Images stacked and combined in Deep Sky Stacker with Entropy weighted average  as well as a simple average of the light frames, and processed in the Gimp, FastStone and Neat image.


This demonstrates that if sufficient data are captured and combined correctly, the SV305 camera is capable of producing very pleasing results

Sunday 19 January 2020

M42/M43 with AstroDMx Capture for Linux, an SV305 camera and a 130mm, f/5 Newtonian

An SVBONY SV305 camera, fitted with an SVBONY UV/IR cut filter was placed at the Newtonian focus of a Skywatcher Explorer 130 PDS 130mm, f/5 Newtonian, mounted on a Celestron AVX GOTO EQ mount.
AstroDMx Capture for Linux, running on a Ubuntu computer was used to capture 16 bit Tiff images of M42/M43: 40 x 2s; 60 x 8s and 20 x 16s, all with matching dark-frames.

Screenshot of AstroDMx Capture, capturing 2s exposures


Screenshot of AstroDMx Capture, capturing 8s exposures


Screenshot of AstroDMx Capture, capturing 6s exposures


The images were stacked for each exposure in Autostakkert!3
The 3 images obtained were post processed in the Gimp 2.10 and combined in the Gimp to produce the final image.

M42/M43

Nicola has implemented some additional functionality of the SV305 in AstroDMx Capture for Linux, not found in Windows capture software. This will be incorporated into the next release of AstroDMx Capture for Linux and will be discussed in a future post.

Saturday 18 January 2020

AstroDMx Capture for Linux on a Linux Lite laptop and in Lubuntu in a Virtual machine on Windows 10 using the SVBONY SV305 camera

Linux Lite was installed on an old Windows 7 laptop as in the previous blog.
AstroDMx Capture for Linux was installed. An SVBONY SV305 camera, fitted with a light pollution filter was placed at the Newtonian focus of a Skywatcher Explorer 130 PDS 130mm, f/5 Newtonian, mounted on a Celestron AVX GOTO EQ mount.
The scope was aimed at M32/43 and AstroDMx Capture was launched.

Click on a screenshot to get a closer view.

Screenshot of AstroDMx Capture for Linux capturing data on the Orion nebula.

The next experiment was to connect the camera to another laptop. This laptop was running Windows 10. An Oracle VM VirtualBox was installed in Windows and within The virtual machine, Lubuntu Linux was installed, and within Lubuntu, AstroDMx Capture for Linux was installed. The camera that previously was connected to the Linux Lite computer was connected to the Lubuntu virtual machine. The camera was passed through the USB to the VM in the VM device settings. AstroDMx Capture for Linux was launched in the VM with the same settings as before and a screenshot was taken.

Screenshot of AstroDMx Capture for Linux running in the virtual machine

The Windows 10 desktop and taskbar can be seen, and covering most of the Windows desktop is the Lubuntu desktop. The Lubuntu desktop was decreased in size just a little so that the screenshot would show the Windows desktop and recycle bin.

The Windows machine is a medium spec ASUS X552E with a quad-core AMD A4 CPU and Radeon HD 8670M 1GB graphics. It ran the VM without any problems. It is, therefore, possible to run AstroDMx Capture for Linux in a Windows machine that is running a virtual machine with a lightweight Linux distribution such as Lubuntu as used here.

Tuesday 14 January 2020

Windows 7 is dead, long live Linux Lite a Windows 7 lookalike

Windows 7 came to the end of its supported life today. This means that it is no longer safe to use a Windows 7 computer for doing online tasks such as browsing, sending and receiving emails and online banking. For many, this is a huge disappointment as Windows 7 was arguably, the most loved of the versions of Windows ever released. It was an operating system that didn’t get in the way and just got things done. Its successor, Windows 8 was a radical change, and was unpopular among Windows users. Windows 10 is an improvement on Windows 8, but for many users, it is intrusive and doesn’t work the way that they really want Windows to work (like Windows 7). Windows evolved into an operating system to use across different form factors such a laptops, tablets and phones. Windows 7 however, was an operating system for desktop and laptop computers and did the job well.

So what is the best thing to do with your ‘old’ Windows 7 computer?

The simple answer is to say, install Linux and have a powerful and very secure operating system. However, having said that, there are many Windows users who are inhibited from taking the plunge and installing one of the many distributions of Linux, fearing that Linux is an operating system for nerds and experts and fearing a large learning curve.

There are many distributions (varieties) of Linux, but there is one that was created specifically for the person wishing to move from Windows 7 over to Linux. The distribution is called Linux Lite.
It was created to make the transition from Windows to Linux as smooth as possible. It provides an interface, or desktop environment that is very similar to Windows 7 and it is just as easy to use. It comes with easy to use familiar software such as Skype, Steam, Kodi and Spotify, a free Office suite called Libre Office that is fully compatible with Microsoft Office and can save in Microsoft Office formats, either pre-installed, or ready to install in Lite Software, within Settings. It also comes with an image processor, the Gimp, which is an excellent alternative to Photoshop. There is no doubt that a Windows 7 user will be able to use Linux Lite from the start and will quickly forget that they are not using Windows.

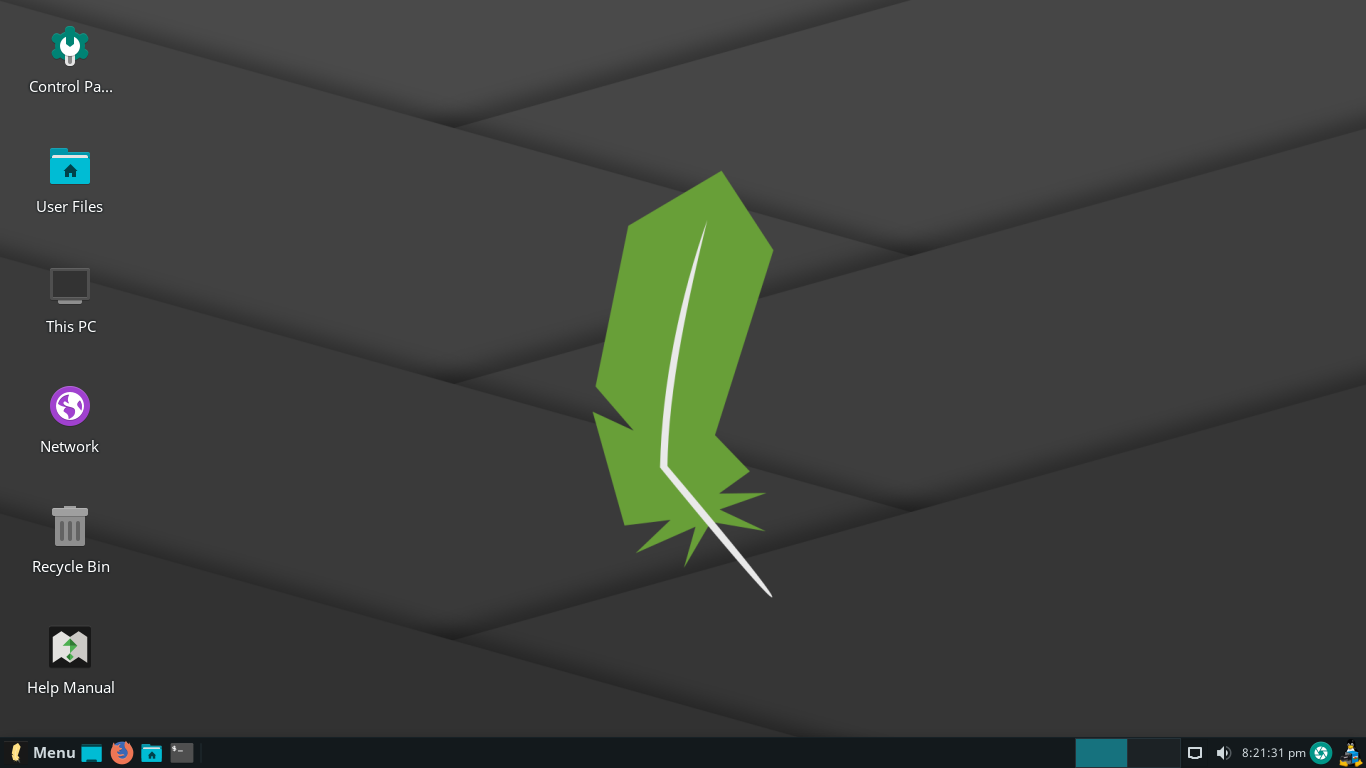
The desktop of Linux Lite

The Menu button is the same as the Start Button in Windows 7
The items in the menu are organised in a logical and easy to understand, and access way.

AstroDMx Capture for Linux starting up in Linux Lite

The desktop environment can be customised to suit your preferences. Below, we can see a similar screenshot to the one above, but using the Dark Theme.


The ISO file for Linux Lite can be found at the Linux Lite website https://www.linuxliteos.com/
They have an online shop where you can purchase a Linux Lite install DVD or a Linux Lite USB bootable memory stick at very reasonable prices. This is the simplest way to install Linux Lite.  However, it can be done for free by downloading the Linux Lite ISO file in Windows and burning the ISO to DVD. All you need to do in Win 7 is to right click on an ISO image file and select Burn disk image. This will launch the Windows disk image burner which will give you the option to burn the iso image to DVD.  An ISO file can be burned to a USB memory stick using free software such as Rufus 3.4. Once the ISO file has been burned to a DVD or USB stick it can be used to install Linux Lite on your computer. All you have to do is to insert the install-media (DVD or USB stick) and reboot the computer. Immediately keep pressing F12 or whatever function key allows you to enter the BIOS and change the order of the boot device. Select the boot medium from the list which will be shown and move it to the top, following the instructions on the BIOS page. Then exit and save the settings. The computer will boot into the installation of Linux Lite and will run a Live image. This is a fully functional Linux Lite but it has an install button which allows the full installation of Linux Lite.

However, you may be a little scared of trashing your Windows 7 and replacing it with a better Linux system. The best thing to do is to replace the Hard drive with a cheap SSD drive. This will allow you to keep Windows on your original Hard drive and install Linux Lite onto a fast SSD drive. As I write this, it is possible to purchase a 240 GB SATA SSD drive for about £25 or a 120 GB SSD for about £16. With most computers from the Windows 7 era it is very easy to replace the hard drive with an SSD drive.

Here are photographs showing the replacement of the hard drive in an ACER Aspire 5733Z. This machine has an Intel Pentium CPU P6200 at 2.13 Ghz

The replacement SSD drive

The Computer turned over to reveal the underside

The first thing to do is to remove the battery

The cover removed to reveal the hard drive which has been removed by simply sliding it out
There may be a caddy and a couple of screws to remove to release the drive

The new drive in place
When all of the screws and items including the battery have been replaced, the computer is now fitted with a fast drive and ready for the installation of Linux Lite.

There are, of course, many other distributions that you could install, but as a smooth transition from Windows 7 to Linux, Linux Lite is probably the best.

With a new, snappy Linux computer, you are ready to do safely all of the things you have been used to doing with Windows, but you now have a powerful astronomical imaging computer that paired with AstroDMx Capture For Linux, will be hard to beat.

Settings can be found within the menus or from the Control Panel on the desktop and can be used to install any of the many popular programs that have been prepared for installation within 'Lite Software'.

This is Settings in Linux Lite
Lite Software can be seen highlighted near the centre of the window.

The following two images show the Lite software that has been pre-set up for easy installation. There is quite a lot, which is why it takes two screenshots to show all of it.


It is a good idea not to pre-install all of this software as much of it may not be required, but it is good that all of the software has been set up so that it can be easily installed without having to search for it and then learn how to install it (even though it is quite easy to do anyway). Linux Lite really has been set up to ease the movement over from Windows to Linux painlessly.

I look forward to using Linux Lite as well as the Chinese distro Deepin Linux to test and produce results from a number of cameras including the SVBONY SV305 deep sky and planetary imager.

Monday 6 January 2020

Maintenance release of AstroDMx Capture for Linux plus a new release for the Raspberry Pi

Nicola has released a new version of AstroDMx Capture for the raspberry Pi.


She has also released a new maintenance release for 64 bit Linux (version 0.66.2) to address issues with the QHY Linux SDK. 

Nicola has worked around the problems and the new release should deal with them.
It is to be hoped that QHY take their SDK development seriously because a camera is only as good as the SDK used to implement it in capture software, however good the hardware might be.

As usual, AstroDMx Capture for Linux can be downloaded HERE.

Saturday 4 January 2020

The SVBONY SV205 camera and how to use it in Linux

The challenging SV205 USB3.0, 8Mp camera will work correctly in Linux (and macOS) only with the new firmware obtainable from the SVBONY downloads site. The camera has to be flashed with the new firmware in Windows as there is no Linux or macOS flashing software. SV205 cameras obtained after August 2019 should not require flashing. The firmware and tool can be downloaded here https://www.svbony.com/sv205-astronomy-camera

In Nicola Mackin's AstroDMx Capture for Linux it is possible to do real-time flat-field correction and it is possible to transform to true greyscale in real time so that the data being saved in the SER files are only 1/3 the size of the 8Mp RGB files, which results is saving at full resolution at frame-rates of about 14fps. Faster frame-rate saving may be possible with fast SSD drives.

A SV205 USB3.0 camera was placed at the prime focus of a Skymax 127 Maksutov for capturing data on the 55% waxing Moon, using AstroDMx Capture for Linux on an Ubuntu laptop. The SV205 suffers from pixel vignetting, which must be corrected by flat fields. AstroDMx Capture for Linux can capture flat-fields and can flat-filed correct in real-time during capture.

Focus is everything in imaging and focusing the SV205 has to be done very, very slowly because there is significant lag and it is very easy to go through focus. AstroDMx Capture for Linux has Frame lag control under Options which will help with this considerably during focusing, but should be reset before capturing.

The SV205 was connected to AstroDMx Capture for Linux which was set to transform to greyscale. An average flat field was applied in real time and 1000-frame SER files were captured of two regions of the Moon.

The best 95% of frames in the SER files were stacked in Autostakkert! 3 and the resulting images were wavelet processed in Registax 5.1. The final images were post processed in Glimpse (a fork of the Gimp) and Pinta.

Screenshot of AstroDMx Capture for Linux capturing Lunar data from the SV205


Lunar image of the Montes Apenninus region of the Moon

Closer view


Lunar image of the Alphonsus, Ptolomaeus, Arzachel region of the Moon

Closer view