AI in astronomical image processing
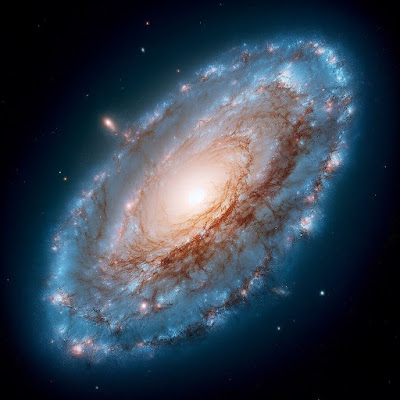
Image Generated with AI
Click on any image to get a much closer view.
Before we can properly discuss the subject of this article, we must first say what AI is:
AI stands for ‘Artificial Intelligence’. It refers to computer systems and machines that can perform tasks that traditionally require human intelligence. AI systems are intended to simulate human cognitive abilities, such as learning, reasoning, problem-solving, perception, and decision-making. AI covers a wide range of techniques, including machine learning, deep learning, natural language processing, computer vision, expert systems, and more. These techniques enable AI systems to analyse and interpret large amounts of data, identify patterns, make predictions, and adapt to new situations or tasks. Machine learning is a subset of AI and focuses on algorithms that can automatically learn and improve from experience without being explicitly programmed.
Deep learning is a subset of machine learning and aims to model the way the human brain processes information by creating deep neural networks capable of learning hierarchical representations of data. Deep learning works through a training process, which involves two main stages: the forward pass and the backward pass. This will be discussed in more detail later, in terms of star removal techniques.
Forward Pass: During the forward pass, input data are fed into the neural network. Each layer of the network performs calculations on the input data, applying weighted connections and activation functions to produce an output. This process is repeated layer by layer until the final output layer is reached.
Backward Pass: In the backward pass, the calculated output is compared to the desired output, and the network's error is calculated using a loss function. This error is then propagated back through the network, adjusting the connection weights at each layer. The aims are to minimize the errors and update the weights in a way that improves the network's performance.
The processes of forward pass and backward pass are repeated multiple times during the training phase. The neural network iteratively adjusts its weights and learns to recognize patterns, extract features, and make accurate predictions or classifications based on the input data. In this way, AI models are generated that are good for particular processes.
However, AI, at the time of writing, is limited to specific tasks and lacks true general intelligence comparable to human intelligence. However, there are two schools of thought regarding the future of AI and its potential benefits and dangers. There are those who see the future of AI as representing an existential threat to humanity at such a time in the future when AI systems are genuinely self-aware and have unfettered access to our control systems. There are others who see no potential threat or who think that the potential benefits outweigh the risks.
There are clear and present dangers of AI (or rather the use of AI) at the moment. Artists are complaining that their works are being used, without their permission to train deep learning systems, and that the products of generative AI art systems will compete with human artists unfairly in the production of ‘artwork’ for various commercial purposes.
AI is being used by various groups to disseminate disinformation. The whole area of deep fakes is a cause of major concern and will not be further discussed here.
Examples of generative AI image generation to illustrate the point.
I used a Generative AI image production tool that is available to anyone that generates images in response to a text prompt.
The first text prompt I used was: “Image of a galaxy with bright hydrogen alpha regions.” This was a result:
The second text prompt I used was: “image of a galaxy with no hydrogen alpha regions.” This was the result:
It is important to realise that neither of these images is a real galaxy. They are not photographs. However, the results obtained do fair justice to the text prompts and would do justice to any artist that produced them. However, they were not produced by a human artist. A question is: Is this art?
The French artist Marcel Duchamp (one of the three artists including Picasso and Matisse, responsible for defining the revolutionary developments in the visual arts) stated that ‘anything is art if the artist says it is.' It is not surprising that he would say this when one considers some of his ‘artwork’ such a ‘Fountain’ which comprised simply a standard urinal!
I suppose that if the AI says it is art, then it IS art (as long as the AI is an artist), or maybe the person who used the AI is the artist.
Most modern, image processing software now boasts AI capabilities. Used with caution, this may be a good thing, but there is an inherent danger that the original purpose of the software could be forgotten, and the honest use of image editors could be compromised.
How can AI be used in the processing of astronomical images?
AI can be used to deblur images which are often blurred by atmospheric turbulence. This can help astronomers to see fainter objects and to get more detailed images of known objects.
Noise reduction: AI can be used to reduce noise in astronomical images, which can be caused by a variety of factors, such as sensor noise and gain.
Image interpolation: AI can be used to interpolate astronomical images, which means filling in missing pixels to create a more complete image. This can be useful for images that have been taken with a small telescope or that have been affected by atmospheric turbulence.
AI can play a significant role in sharpening astronomical images by mitigating the blurring effects caused by the point spread function (PSF) and enhancing the fine details of celestial objects. Here are some ways in which AI can aid in this process:
Deconvolution: AI algorithms can be trained to perform image deconvolution techniques specifically tailored for astronomical images. These algorithms learn the characteristics of the PSF and use that information to deblur the image and recover fine details. Deep learning-based deconvolution methods, such as convolutional neural networks can model the complex non-linear relationship between the blurred and sharp images.
The point spread function (PSF) refers to the overall blurring effect of an imaging system on a point source of light. It describes how the light from a single point in an astronomical object spreads out on the image plane due to various factors such as the optical system's characteristics and the effects of the atmosphere.
The PSF exhibits a characteristic shape, which can be approximated by a mathematical function such as a Gaussian, Moffat, or Airy function. It is especially important in tasks like deconvolution and image restoration, where the goal is to recover the original object's details by estimating and reversing the PSF.
Super-resolution: AI-based super-resolution techniques can be employed to enhance the resolution and details in low-resolution astronomical images. By training on large datasets of high-resolution and corresponding low-resolution images, AI models can learn to generate high-resolution versions of the input images by inferring the missing details. This can help reveal more details about objects, especially in cases where the images suffer from poor atmospheric conditions or limitations of the imaging equipment.
Denoising: Noise is an inherent part of astronomical images and can obscure details. AI algorithms, such as denoising autoencoders or generative adversarial networks (GANs), can be trained to denoise images while preserving important features. By learning from clean and noisy image pairs, these models learn to remove noise while retaining the underlying structure and details. A Generative Adversarial Network (GAN) is a class of machine learning model comprising two neural networks: a generator and a discriminator. The objective of a GAN is to generate synthetic data that resemble the training data it has been given. The generator network is responsible for generating new samples from random noise or a given input. Initially, the generator produces random and low-quality samples. The function of the discriminator network is to differentiate between the real data from the training set and the synthetic data generated by the generator. It learns to classify the samples as real or synthetic. Training a GAN involves an adversarial process where both the generator and discriminator networks compete against each other. The generator tries to improve its generated samples to cause the discriminator to classify them as real. Simultaneously, the discriminator is trained to better distinguish between real and synthetic data. Ultimately, the goal is for the generator to generate realistic samples that can cause the discriminator to classify them as real data. This to and fro process of training continues until the generator can produce synthetic samples that are indistinguishable from the real data so far as the discriminator is concerned.
Image enhancement: AI can assist in enhancing astronomical images by adjusting contrast, brightness, and color balance to bring out hidden details and improve visual appearance. Deep learning models can learn to optimize these enhancements by training on expert-curated datasets, allowing for automated and consistent improvements in image quality.
AI-assisted image sharpening techniques have the potential to significantly improve the quality of astronomical images by applying machine learning and deep learning algorithms.
One must obviously be cautious about the use of these techniques as there is always the possibility of the introduction of artefacts.
Using AI to increase the size of a small planetary image
Topaz labs produce AI software that can deal with three aspects of interest to astronomical imaging. Topaz DeNoise AI, Topaz Sharpen AI and Topaz Gigapixel AI.
We shall illustrate a technique akin to super resolution using Topaz Gigapixel AI to increase the size of a small image of Mars that we captured in 2020 with AstroDMx Capture for Windows, an 8” SCT with a 2x Barlow and an SVBONY SV305 camera.
The image increased to 4 times its size in Topaz Gigapixel AI
Noise reduction and detail recovery are taking place here.The 4x image was loaded into the Gimp 2.10 and scaled back to 2x the original size
We have thus used AI successfully to achieve our aim of increasing the size of a small planetary image without compromising its quality.
Using AI to remove stars from a deep sky image
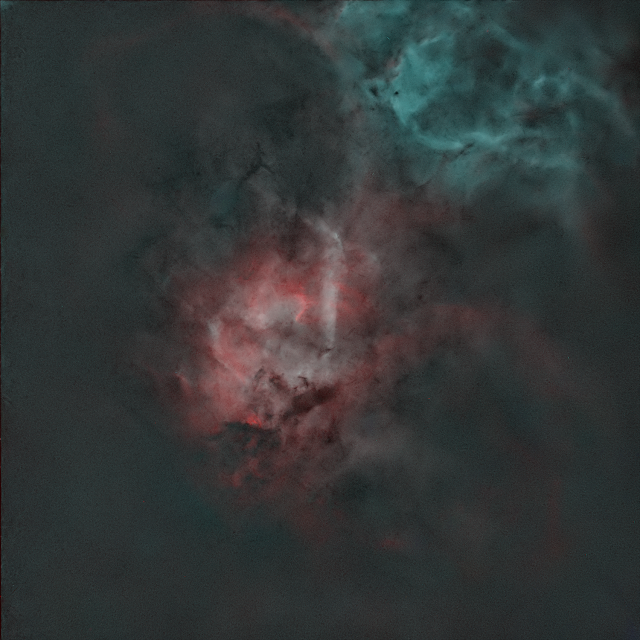
Here we use the Starnet ++ plugin for the Gimp to remove stars from an image of the Wizard nebula so that the nebulosity can be processed and stretched without affecting the stars, which can later be added back into the image at any level required.
The Starnet++ AI program was written by Nikita Misiura
It works as a standalone, command-line program or with a GUI as well as being available as a plugin for Gimp and Pixinsight. For some time, version 2 of Starnet++ was not available for Pixinsight and version 1 was really inadequately trained, so did not give as good results as competing star removal plugins. Now however, Starnet++ version 2 is as good as any.
Starnet++ is an Artificial Neural Net, (ANN). It is a convolutional neural network with encoder-decoder architecture, a type that is often used for image recognition and classification. The encoder is a convolution that acts as a feature extractor and the decoder is a deconvolution that recovers image details.
An ANN is a simulation in algorithms of the way that a brain is constructed from neurons.
The idea of an ANN was developed in 1943, by Warren McCulloch and Walter Pitts who made a computational model for neural networks using algorithms. The model was called the 'McCulloch-Pitts neurons.' Of course, they were way ahead of their time because the computational resources required did not exist at the time. However, computers and computer languages have since developed, so that artificial neural networks can be put to work on modern consumer computers.
As we discussed earlier, an Artificial Neural Network simulates how a real neural network works. Real neural networks learn by receiving lots of input data and processing them to produce an output. The output then feeds back into the network where it is compared with the goals of the operation. If the goals are partially achieved, then the positive feedback reinforces the ongoing learning process.
An ANN works in an analogous way. However, there are no physical neurons as there are in a human brain, Instead, there are software nodes. The nodes are connected (i.e. can affect each other) by software and each node contains two functions: a linear function and an activation function. The linear function does a specific calculation and the activation function, depending on the value computed by the linear function, ‘decides’ whether to ‘fire’ (i.e whether to send a signal to a connected node or not). The connection between two nodes has a weight. Its magnitude determines the size of the effect of one node on another and the sign of the weight determines whether the effect is to reinforce or suppress the connected node. As the signal propagates through the network, it moves through sections whose calculations look at small groups of pixels 'looking' for small details and on to regions of the network that find larger features in the pixels. The system is learning to recognise stars, and then, to remove them. The neural network is based on linear algebra and GPUs are optimised for working with matrices (matrix algebra is a large component of linear algebra), so powerful GPUs can facilitate the functioning of an artificial neural network.
A typical artificial neural network has three groups of interconnected nodes. First is a ‘layer’ of input nodes that receive the input data. Second is a layer, or several layers of so-called hidden nodes. The hidden nodes receive data from the input nodes and the signal propagates according to the weights and the results of the calculations in the linear function, and the activation function, across the layers of hidden nodes. Finally, the signals that have got through to the output nodes produce the output signal. What we want to give to the ANN is an image with stars and nebulosity, and to get out of it, an image with just the nebulosity and the stars removed.
The ANN will ‘learn’ by feedback, or backpropagation as mentioned earlier. This involves comparing the actual output with the intended output, in other words, looking for the differences between the output and the intended output. The difference is used to modify the weights of the connections between nodes in the network, going backwards from the output nodes, through the hidden nodes to the input nodes. This is what causes the network to learn and reduce the differences between the output and the intended output. Eventually, the process reduces the differences between the output and the intended output, until they are one and the same. In the case of our astronomical application, the input is an image with stars and nebulosity and the intended output is an image with just the nebulosity.
Starnet++ doesn’t work on the whole image at once. The image is divided into square tiles, the size of which is controllable by the user via a variable called 'stride'. Stride defaults to 64 x 64 pixels. If the tiles are smaller, then the program runs slower, but produces an overall smoother result, and vice versa.
Using AI to remove gradients and do background extraction
For this purpose, we used a program called GraXpert which among its interpolation modes has an AI mode that is now on its second AI model.
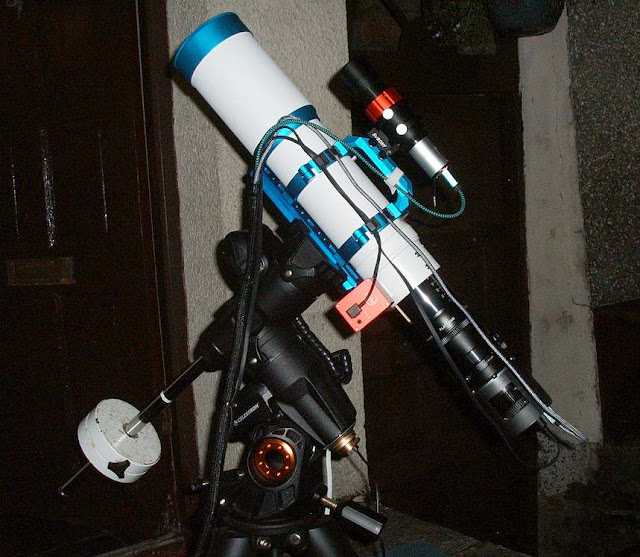
An hour’s worth of 5-minute exposures of the Wizard nebula were captured by AstroDMx Capture through an Altair Starwave 60 ED refractor with an 0.8 reducer/flattener, an Altair Quadband filter and an SV605CC 14 bit OSC CMOS camera.
The Autosave.tif stacked image was loaded into GraXpert initially with no stretch.
The original image was displayed
The Calculate Background button was clicked, and the background was extracted by the AI.
The background
The stretched and processed image was saved
Here we can see that the AI model is on version 1.0.1
Topaz DeNoise AI or PaintShop Pro 2023 AI could have been used if required.
Image after denoising applied
The starless image was stretched and colour processed in the Gimp
The stars were added back in the Gimp
Final image of the Wizard nebula
So, two AI procedures were used to produce this image: AI background extraction in GraXpert and star removal in the Starnet++ AI Gimp plugin.PaintShop Pro 2023 Ultimate was also used to demonstrate AI upscaling and noise reduction in the starless Wizard nebula image.
Setting up the AI procedure
PaintShop Pro 2023 Ultimate opaquely obscures the image with a moving geometric display while the AI procedures are being performed.
AI is everywhere and impinges on most aspects of life, from shortlisting candidates for jobs, to dealing with customer enquiries. Here we have seen how AI is present in the landscape of astronomical image processing, and we have just looked at three instances of it in our own image processing.
AI is being used in firmware for example in the control of high-end smartphone cameras, some of which are able to track selected targets within the camera’s field of view, keeping the targets in focus and even zooming in on the target whilst still imaging the wider field. It seems inevitable that AI will creep into the firmware of astronomical imaging cameras and change the way that they acquire image data. Moreover, AI SOCs will also likely be incorporated into future astronomical camera design. All of this against a background of AI inching its way into regular astronomical image processing software. Progress in this area is moving apace and will benefit from the development of new SOCs with more capable GPUs and AI components.
The next few years with AI could be ‘Interesting times’ as the apocryphal ‘Chinese curse’ would wish upon us.


