Friday, 19 August 2022

Feature-Maintenance release of AstroDMx Capture

 Nicola has made a Feature-Maintenance release of AstroDMx Capture for all operating systems: Version 1.6.2.0.

Mutatis mutandis

This release comes before a major release incorporation the first of a set of advanced features.

In Version 1.6.2.0 the SDKs have been updated for almost all cameras

Support for some cameras other than the SVBONY family of cameras has been implemented in AstroDMx Capture for ChromeOS. However, something that we have feared may happen, has happened. With the recent update to ChromeOS that introduced pass through of USB devices to Android, whereas previously there was only pass through of USB devices to Linux (running in Crostini), Google seem to have broken USB 3.0 pass through for some, but not all cameras. Where a camera is affected, a workaround is to use a USB 2.0 cable and the camera works again. This is something that we have been hoping would not happen but has always been a possibility. The new SV505C camera will not work in the ChromeOS virtual Linux environment.

Support for some of the older Linux distributions has been discontinued (although by running an older version of AstroDMx Capture, someone running an old distribution will be able to continue using things as they are). This decision has been forced on us by the latest SVBONY SDK which is now tracking a newer version of glibc.

This is not unreasonable at the moment, as older distributions are rightly, eventually deprecated; but we will liaise with SVBONY to make sure that they do not unwittingly preclude any other Linux distributions which do not track the newer glibc versions in their future SDKs. The minimum glibc requirement is now 2.27.

The next major release of AstroDMx Capture Version 2.0 will add INDI mount-control (with plate-solving functionality), camera, filter-wheel and focuser support together with other improvements. However, it is entirely possible that an intermediate maintenance release may have to be made in the meantime.

Version 2.0 of AstroDMx Capture will be released when all bench and field testing of the functionality has been completed.

AstroDMx Capture can be downloaded HERE.

Sunday, 14 August 2022

The Eastern Veil nebula with an SVBONY SV405CC

Another session testing advanced features of AstroDMx Capture being developed by Nicola. The image was acquired, centred and imaged with AstroDMx Capture. Auto-guiding was done with PHD2. The feature being tested was to do an imaging run with the object on the east of the meridian, capture an image for plate-solving, perform a meridian flip, plate-solve the image previously captured, send the mount to the coordinates specified by the plate solve, plate solve a fresh image and automatically centre the object. To get the image orientation the same as in the original batch of images, the preview (and hence the captured images) must be flipped and flopped. When dark-frames are eventually captured at the end of the session, they must be copied and flipped and flopped to be used to calibrate the first set of images (The equivalent of rotating through 180 degrees). (This is because any amp-glow will have to be in the correct position relative to the captured images). This procedure worked perfectly in the tests.

Nicola is preparing a program to flip and flop FITS or TIFF images to facilitate the use of a single set of dark-frames with meridian-flipped data.

The equipment used

We used an 80mm f/5 Apochromatic Triplet  refractor with a field flattener on an AVX mount, an L-eNhance narrowband filter in an Altair magnetic, 2" filter holder and an SVBONY SV405CC OSC camera. The guide-scope was an SVBONY SV165 fitted with a QHY-5II-M camera.

The FITS data were calibrated and stacked in Deep Sky Stacker and post processed in the Gimp 2.10.

Click on the image to get a closer view

Stack of 1 hour 15 min, of 3 min exposures of the Eastern Veil nebula.


The next release of AstroDMx Capture will be a simple feature-release to expand the range of supported cameras, update SDKs and fix issues.

The next major release will contain some of the advanced features that have been discussed in previous posts. Nicola has decided to update AstroDMx Capture for all operating systems incrementally as the advanced features are implemented. This is instead of implementing all of the planned changes before a major release is made, and extending the time period before they are available for use.

This is a major undertaking and is being done in available time. When a major release is imminent, it will be reported here.

Tuesday, 9 August 2022

The SV505C, a new planetary camera from SVBONY and AstroDMx Capture

Nicola has been implementing the prototype of a new SVBONY camera, the SV505C in AstroDMx Capture.

SV505C OSC camera


The SV505C is an OSC camera with a Sony IMX464 sensor. It has a built-in 128MB DDR III buffer.The sensor is 4.0MP with a diagonal of 9mm. The pixel size is 2.9μm x 2.9μm. It has a 12 bit ADC, supports ROI and binning to 2x2.

The SV505C is a planetary camera but these experiments also tested its potential as an uncooled bright-deep-sky-objects camera.

The SV505C was used with a variety of telescopes: (80mm apo refractor, Skymax 127 Maksutov and 130mm Newtonian) as part of the testing of the advanced functionality in AstroDMx Capture, and testing the implementation of the camera.

Lunar and planetary data were captured as SER files and deep sky data were captured as 16 bit FITS files.

Some of the setups used for Deep sky imaging

80mm apochromatic triplet refractor


130mm Newtonian reflector


We shall simply list here some of the results that we have obtained with the SV505C

Planets

Saturn


Jupiter


Deep Sky

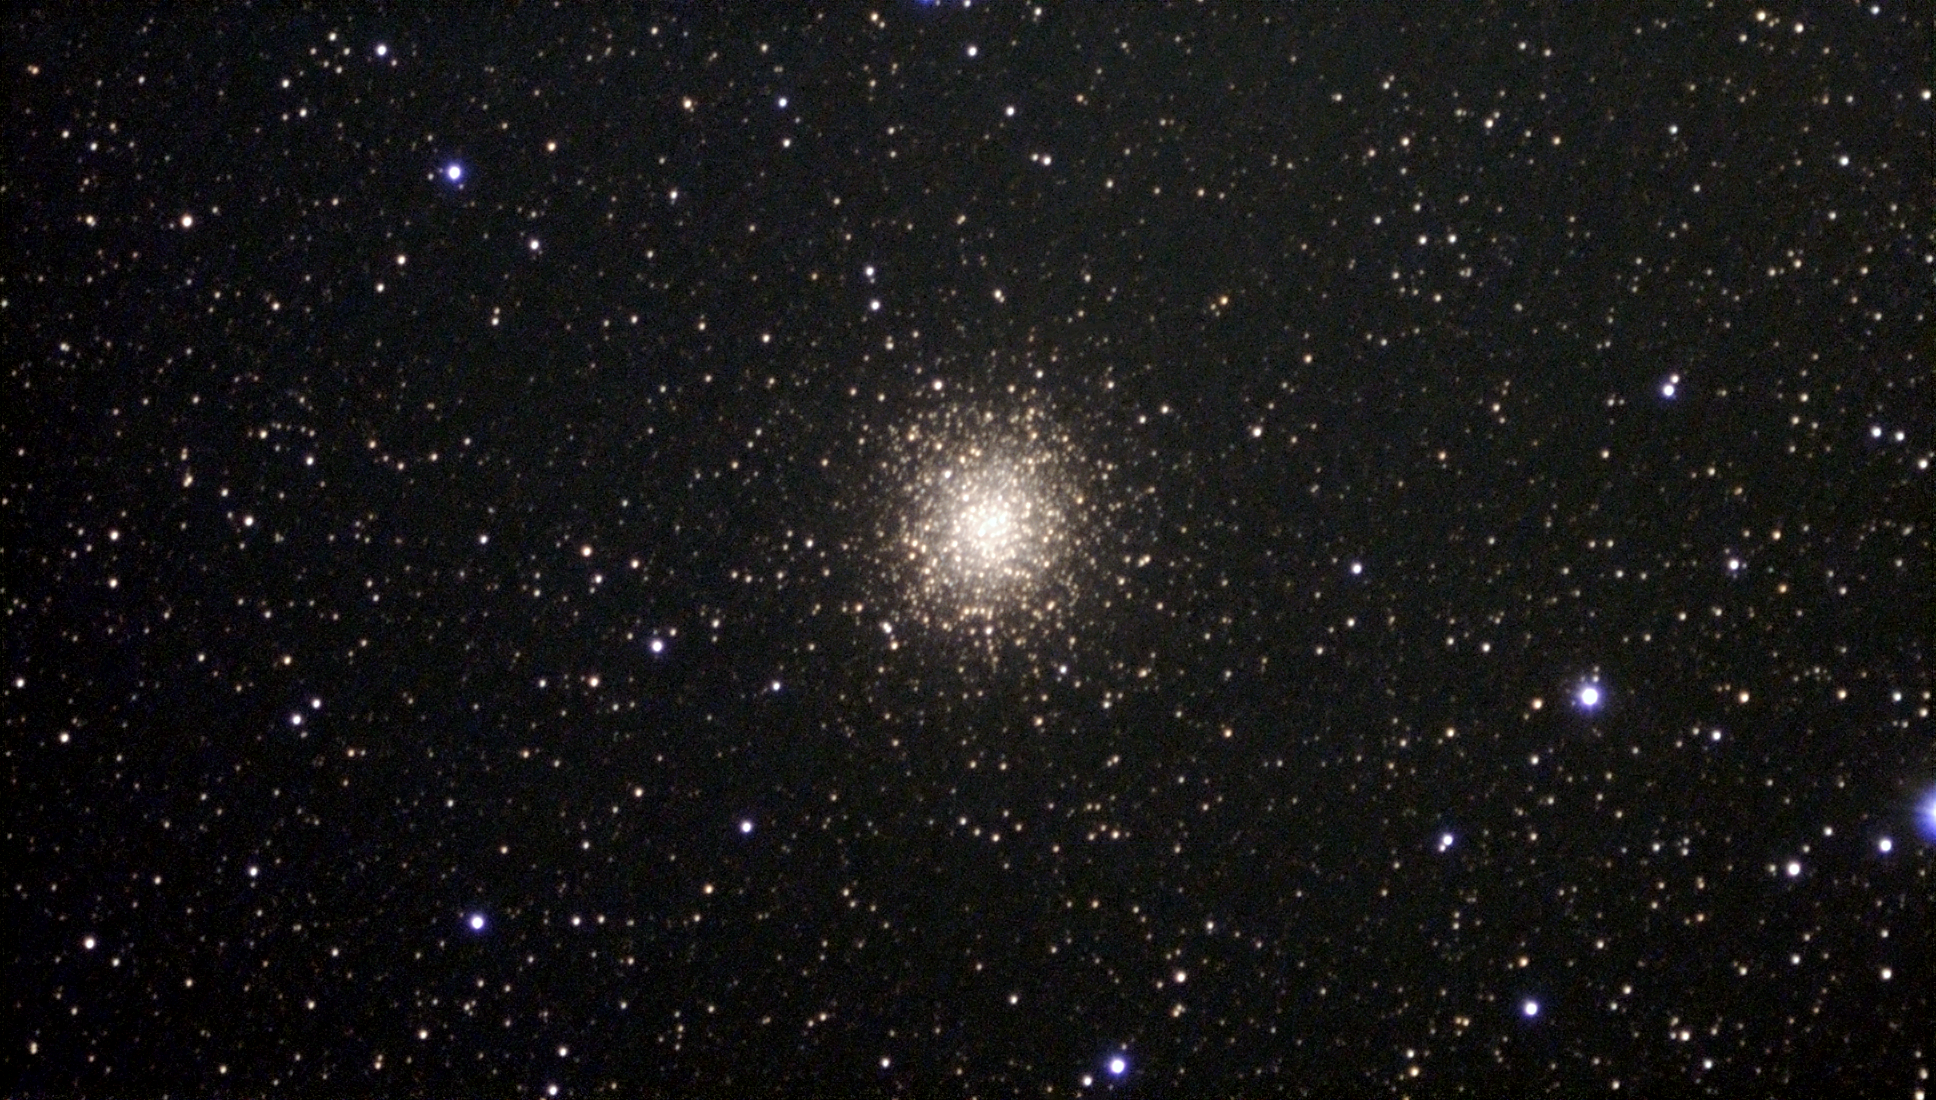
M13


The Western Veil nebula


Lunar


The SV505C aquitted itself quite well both for its intended application as a planetary camera, and outside its comfort zone as an uncooled deep sky camera. Significant diagonal systematic noise recorded during deep sky imaging means that the camera will definitely benefit from dithering during capture.

A feature release of AstroDMx Capture will be released with support for the SV505C, but as yet, without the advanced features under development and reported previously, as soon as our testing of the camera implementation is complete.


Sunday, 31 July 2022

Progressing with increased functionality of AstroDMx Capture

Although there is still a lot of work to do implementing and testing across all platforms, including the debugging of faulty third-party drivers and SDKs, Nicola now has a lot of the advanced functionality working in an alpha state. There is other functionality not shown here that will take some time to finally integrate into AstroDMx Capture.


The test rig; self-powered and able to perform all of the tasks via the INDI server running on the Raspberry Pi.

The INDI server, which has been allocated a static IP address, communicates with AstroDMx Capture via the network. The rig can work with an AZ or EQ GOTO mount.

In addition to developing and implementing the advanced features, Nicola is also attending to issues that come to light as AstroDMx Capture is used in the field.

If we get clear skies this will facilitate the completion of this stage of the work. When a version of AstroDMx Capture is eventually released with the functionality being currently integrated, the project will not be complete, as the total intended functionality will not yet have been fully implemented.

When we consider it ready, a new version of AstroDMx Capture will be released containing the increased functionality to date. When that will be depends largely on extraneous factors such as the weather and the pressures of other work. When it is ready, a post announcing this will be made here. 

Wednesday, 27 July 2022

Mount and focus control with AstroDMx Capture

The AstroDMx Capture project now stands at 81KLOCs (thousands of lines of code) plus internal documentation. As has been reported in recent posts Nicola has been implementing mount control in AstroDMx Capture. Now she is implementing focus control.


The focuser implemented here is the Pegasus focuscube V2.

The focuser was attached to our test Ekinox, ED 80mm, F=440mm refractor. The centring eyepiece was parfocal with the camera used in the tests.

The INDI server used to control the mount and focuser was running on a Raspberry Pi running Raspberry Pi OS.

The equipment in action

The tripod on the right is holding an occultation board to shield the setup from a nearby streetlight. The white bag hanging under the tripod contains a weight which serves to lower the centre of gravity and give more stability to the occultation board. The Raspberry Pi can be seen on the floor and was connected to the mount hand controller and the Pegasus focuser. A Player-One Mars-C II (IMX662) uncooled OSC camera fitted with an IR/UV cut filter was used in these tests. The mount was given a simple two-star alignment prior to conducting the tests. This camera has an ideal field of view for our experiments, and although it is a planetary camera, it is very sensitive and is able to be used with a number of deep sky objects.

Nicola is making changes to the UI to integrate the focuser controls.
The first tests were to calibrate the focuser so that it has a fully in and a fully out position.
The mount (scope) was sent to Mizar and a Bahtinov mask was placed at the end of the scope. The focuser was operated until Mizar came into perfect focus.

Mizar at focus using the Bahtinov mask

With focus established, AstroDMx Capture was set to remember the focus point. Later in the evening, AstroDMx Capture sent the scope to Vega. The AstroDMx Capture controls were used to completely defocus Vega and then the focuser was sent to the focus point automatically. The Bahtinov mask was briefly placed on the scope and Vega was seen to be in perfect focus.

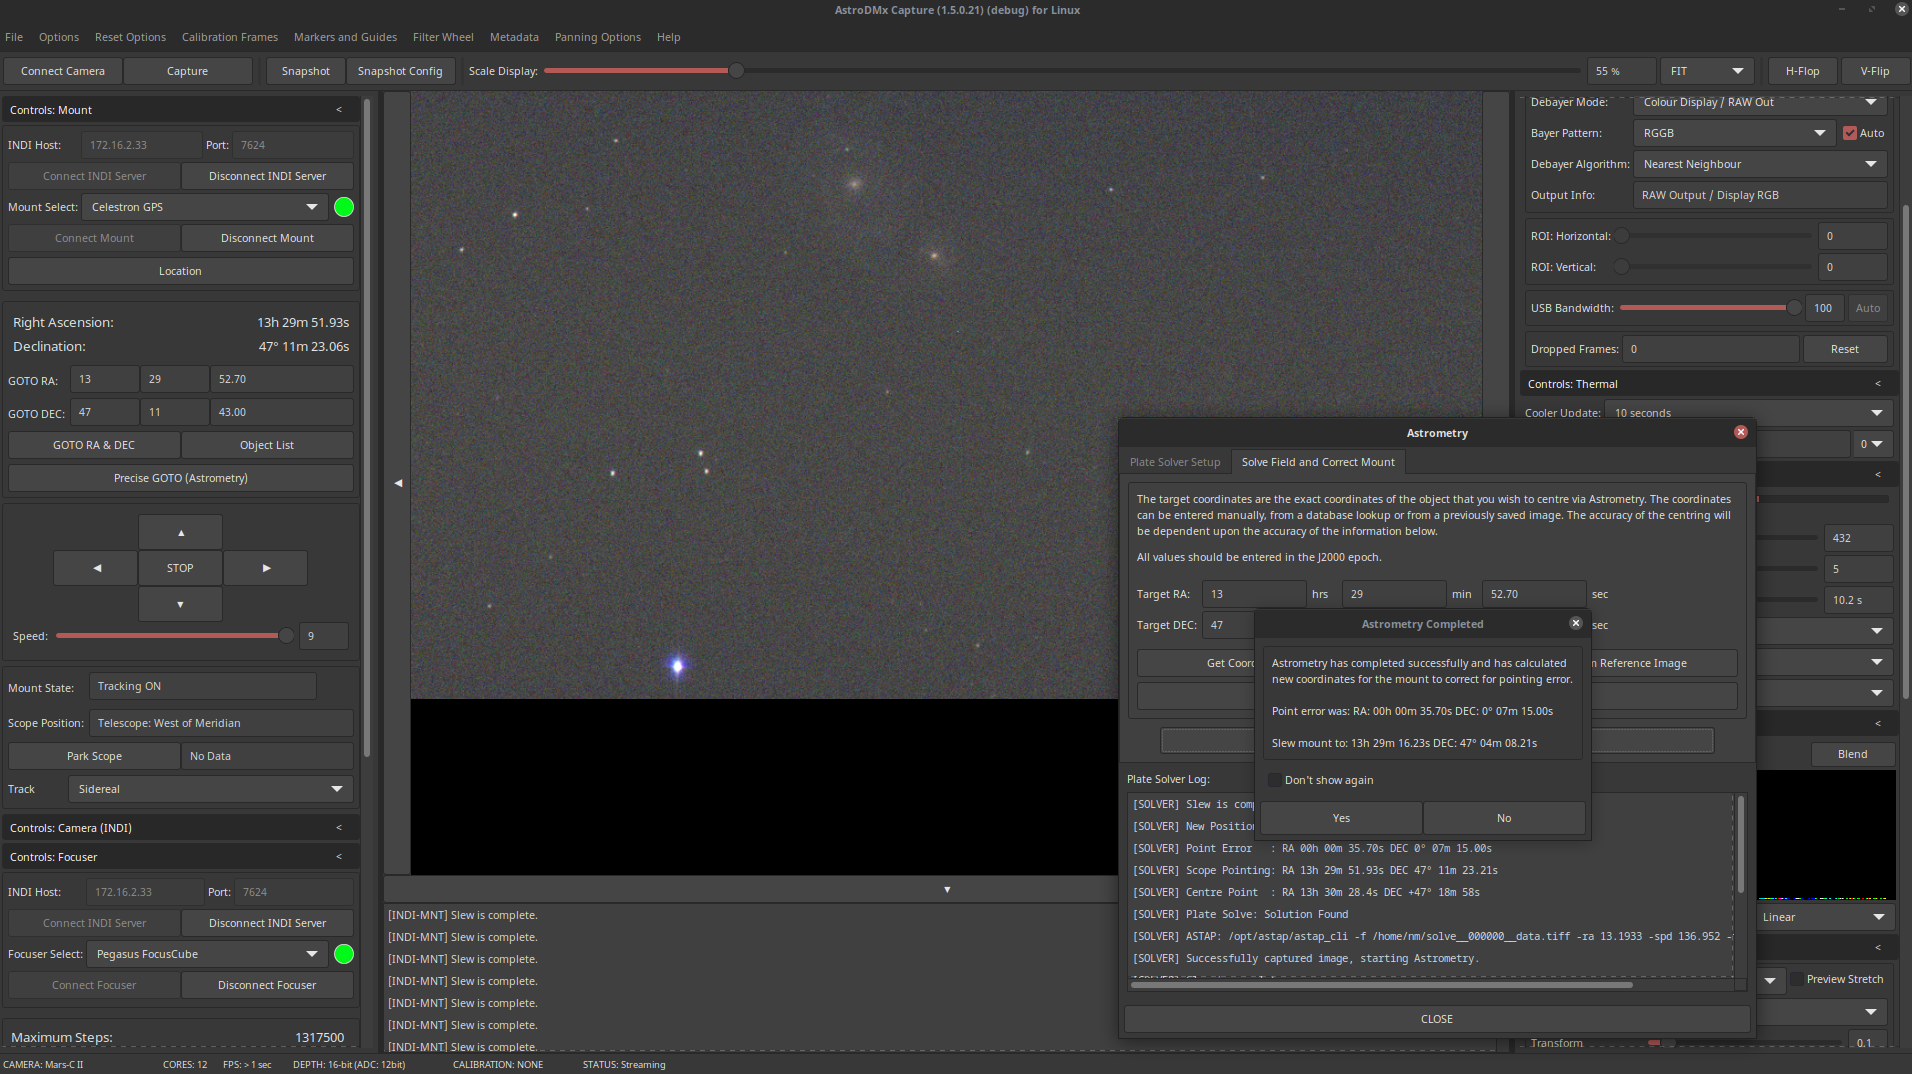
Some additional tests of sending the scope to an object, plate solving the field of view and then implementing the corrections calculated by AstroDMx Capture to centre the object were done as previously reported.

The result of sending the scope to M51

M51 is in the camera's field of view but not perfectly centred.
The field of view was plate solved and the corrections computed by AstroDMx Capture were used to centre the object.
M51 Centred

It must be remembered that thus far, this was not an imaging session, so the objects being acquired do not need to be bright (which would involve longer exposures). This part of the session was all about object acquisition and focusing.
An additional test was done where once an object was acquired and centred, an image was taken of the field of view with the object centred. The mount was then slewed away to another object at some distance. Then the image that had been captured of the centred object was plate solved and the coordinates used to return the mount to the exact position with the object centred.

Lastly, to allow some data capture, AstroDMx Capture sent the scope to M14

M14 acquired but not centred

  M14 Centred

Then AstroDMx Capture was used to capture 80 x 30s unguided exposures of M14 with 20 matching dark frames.
The data were calibrated, registered, and the best 90% stacked in Siril. The resulting image was post processed in the Gimp 2.10.

M14

The functionality of AstroDMx Capture is increasing incrementally as Nicola implements new functions. There is, as yet, no fixed date for a new release with additional functionality, but the date draws closer.


Saturday, 16 July 2022

Mount control by AstroDMx Capture for Windows and a Raspberry Pi INDI Server

 Mount control by AstroDMx Capture for Windows and a Raspberry Pi running an INDI Server

Although this experiment was done with AstroDMx Capture for Windows, it all works the same way with other operating systems.

This was not an imaging session, it was an experiment into the ability of AstroDMx Capture, using an INDI server running in a Raspberry Pi SBC to send the scope (mount) to a variety of objects and then to centre them on the camera sensor.

The equipment used

  • Celestron AVX GOTO mount
  • An EKINOX, 80mm, F=440mm ED refractor fitted with a Skywatcher motor focuser
  • A Player-One Mars-C II (IMX662) OSC camera fitted with an Optalong LeNhance narrowband filter.
  • A Raspberry Pi SBC running an INDI Server
  • A Bahtinov mask


The Raspberry Pi was placed on the floor between the feet of the tripod, attached to the hand controller, and communicating with the network wirelessly.


The INDI server uses the INDI library. The INDI Library is open source software for controlling astronomical devices such as mounts. It is based on the Instrument Neutral Distributed Interface (INDI) protocol and acts as a bridge between software clients and hardware devices. It enables a client to communicate with equipment directly over a network.

The mount was given a normal 2-star alignment after which, the camera was placed at the focus of the scope. The accuracy of the mount's intrinsic GOTO functions will depend of the accuracy of the polar alignment, which alignment stars are used and the accuracy of their alignment. However, the system used here should correct for any inaccuracies.

The scope was precisely focused on last alignment star using a Bahtinov mask


Results

The GOTO sent the scope (mount) to M17, but the Omega Nebula has not been placed in the centre of the sensor’s field of view. The accuracy of the GOTO will depend on the accuracy of the polar alignment and the number, and accuracy of the alignment stars. With a small sensor such as that in the Player-One Mars-C II (IMX662) OSC camera, it is even likely that the object could miss the required object entirely.


However, AstroDMx Capture can plate solve an image of the current field of view and calculate the corrections required for the mount to centre the object on the sensor.


AstroDMx Capture can then be set up to go to another object and is set up here to move on the M20, the Trifid Nebula.


The mount has slewed to the Trifid nebula but the object is not in the centre of the field of view.


The star field has been solved, the corrections to the mount have been calculated and M20 has been placed in the centre of the field of view.


The mount is now being set up to slew to another object, M16


In this case, the scope(mount) has been sent to M57, but the object hasn’t fallen on the sensor at all, it is somewhere just outside the field of view.


The star field has been solved, corrections to the mount made, and M57 has been placed in the centre of the field of view.

As previously stated, this was not an imaging session, it was an experiment to test the ability of AstroDMx Capture and a Raspberry Pi running an INDI server to control an equatorial mount and to centre objects of interest in the camera's field of view. A camera with a relatively small field of view was used in order to make the plate solving more challenging.

The system worked perfectly and brings the new functionality of AstroDMx Capture that much closer to release. The GUI will continue to be refined as the software approaches release.

Wednesday, 13 July 2022

Controlling an AZ mount with AstroDMx Capture

So far our experiments have been with AstroDMx Capture controlling an equatorial mount.

In this article we describe the results of controlling a Skywatcher Star Discovery AZ mount with AstroDMx Capture. The system works in exactly the same way as for an EQ mount.

The system works by using an INDI server installed on a Linux computer. AstroDMx Capture communicates with the mount via the INDI server.


The INDI server uses the INDI library. The INDI Library is open source software for controlling astronomical devices such as mounts. It is based on the Instrument Neutral Distributed Interface (INDI) protocol and acts as a bridge between software clients and hardware devices. It is network transparent enabling a client to communicate with equipment directly over a network.

An Ekinox 80mm ED refractor was mounted on a Star Discovery AZ mount and a Player-One Mars-C II (IMX662) OSC uncooled camera was placed at the focus. The mount hand controller was connected to the computer running the INDI server and AstroDMx Capture logged onto the INDI server via the network. The Star Discovery mount was given a two star alignment and AstroDMx Capture was used to instruct the mount to go to the globular cluster M3. As a two star alignment was used to align the mount, it is anticipated that there will be some pointing inaccuracy and the object will either not fall on the camera sensor or at least, will not be centred.

M3 in the AstroDMx Capture preview screen


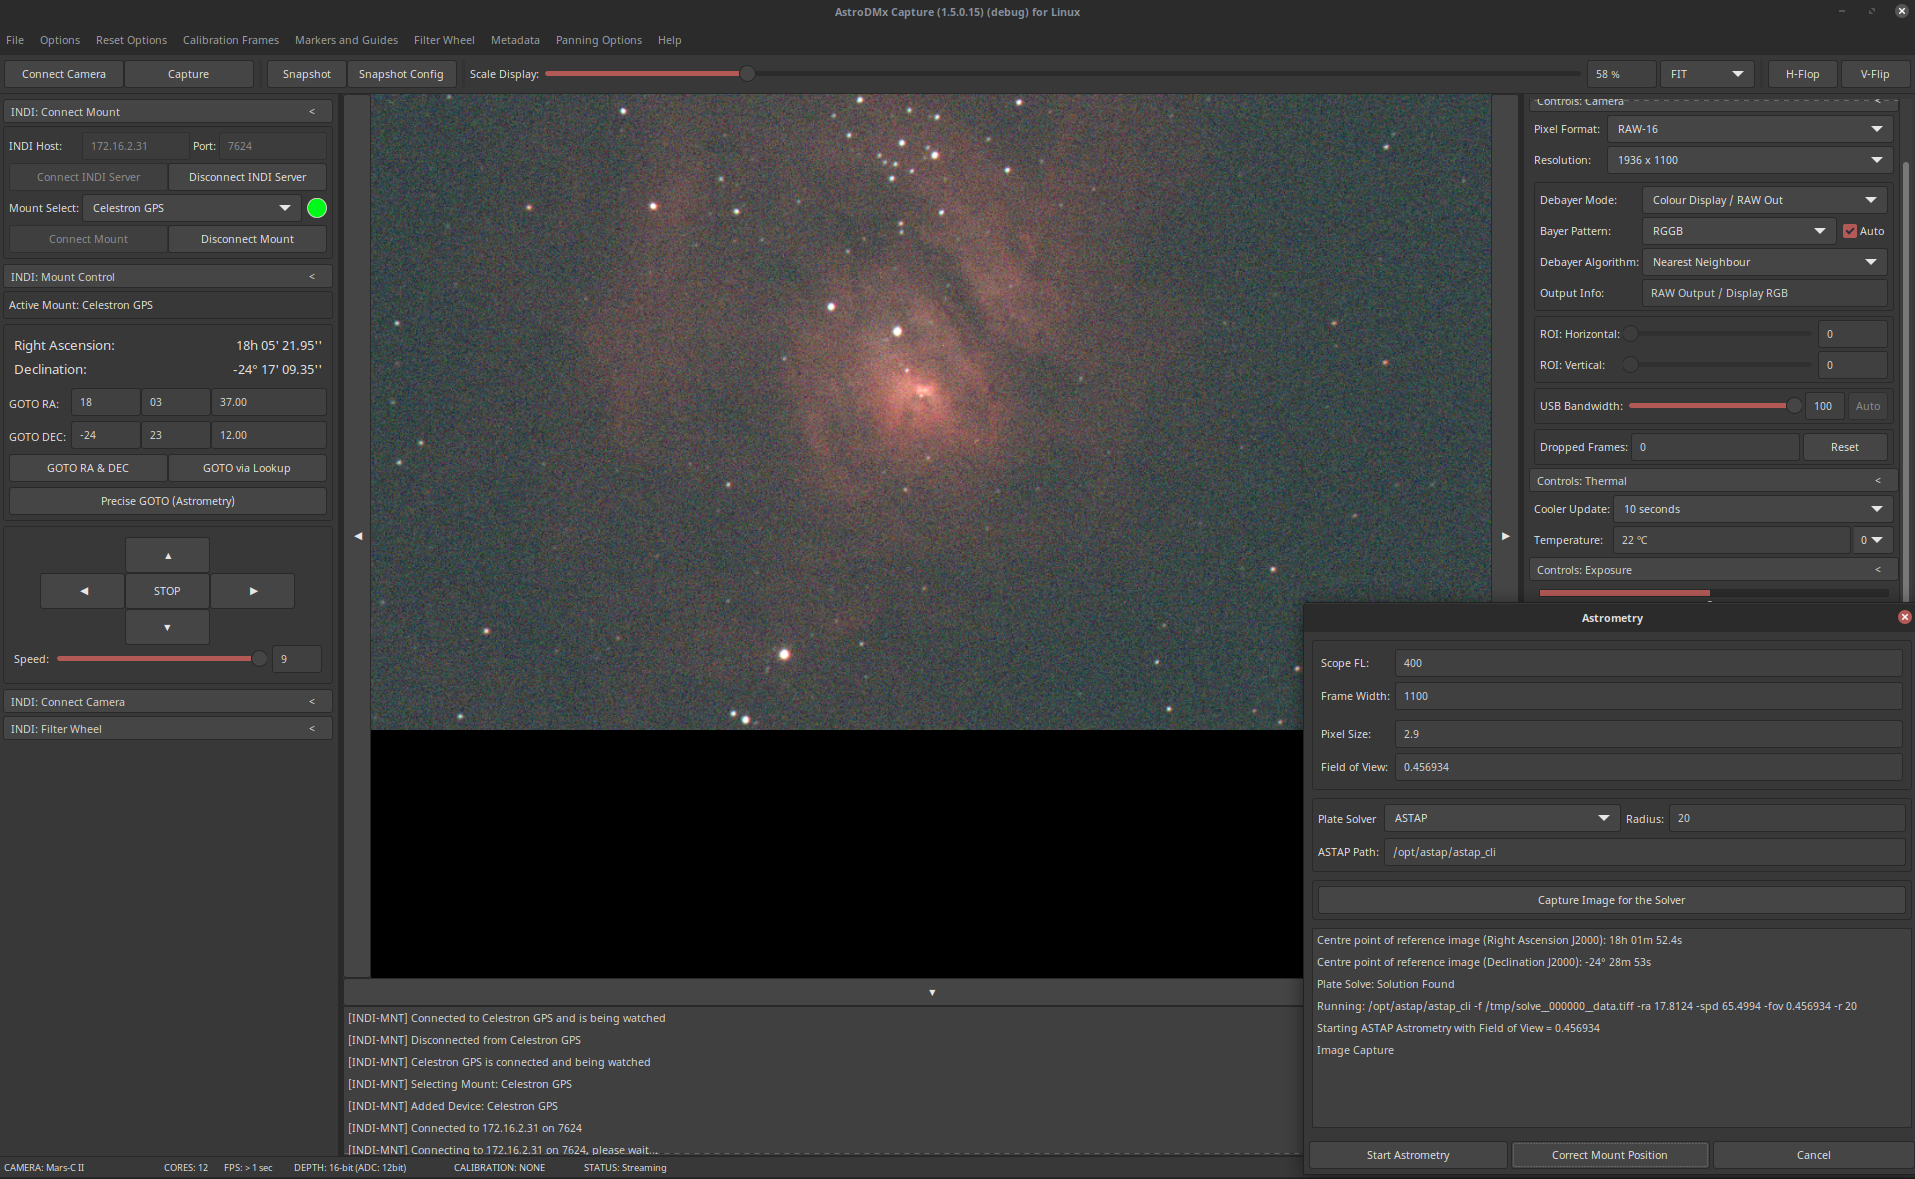
In order the centre the object, AstroDMx Capture takes an image, plate solves the field of view, calculates the position errors and then is used to instruct the mount to centre the object.

M3 Centred


In this example, the mount has been sent to M17 but most of the nebula is out of the field of view of the sensor.


After plate solving the field of view and instructing the mount to centre the object, the object is centred. 


It would, of course, be possible to nudge the mount using AstroDMx Capture controls, to obtain a more pleasing composition if required.

The mount was then sent to other objects, which were then centred. The results are shown below.

M13


M57


M27


In this experiment, no images were captured (other than to demonstrate the procedure in operation. The aim was to demonstrate that if required, AstroDMx Capture can control an AZ mount.
As these features are developed in AstroDMx Capture, the UI will evolve until we consider it to be optimal.


Sunday, 10 July 2022

Returning to the same field of view, based on an image

We have been testing a function that Nicola has been implementing in AstroDMx capture, where one can arrange the objects of interest on the preview screen, Capture an image of the arrangement and then use AstroDMx Capture to send the mount (scope) in the future, precisely back to the same arrangement of objects and position it exactly as before.

The function worked perfectly so despite the fact that there was a 69.7% Moon nearby and low in the sky, it was decided to capture data on the Lagoon and Trifid nebula that were in the same field of view of an SVBONY SV405CC OSC camera on a Skywatcher Esprit 80 ED Super APO Triplet refractor fitted with a field flattener and mounted on a Celestron AVX mount.

Click on an image to get a closer view

Screenshot of AstroDMx Capture for Linux being used to capture 40 x 30s FITS exposures of the Lagoon and Trifid nebulae region

Matching dark-frames were captured.

The data were stacked and part processed in Deep Sky Stacker and post-processed in the Gimp 2.10.

The Lagoon nebula, M8 and the Trifid nebula, M20


The new functionality in AstroDMx Capture is progressing to our satisfaction, and we look forward to imaging these objects in a dark sky and to testing further new capabilities before a release is made with new capabilities.

Friday, 8 July 2022

M8, the Lagoon nebula using new functionality in AstroDMx Capture with a Player-One Mars-C II

Using a Skywatcher Esprit 80 ED Super APO Triplet refractor mounted on a Celestron AVX mount. A Player-One Mars-C II (IMX662) OSC uncooled camera was placed at the focus. AstroDMx Capture for Windows was used to capture the image data on M8, the Lagoon nebula. The mount was given a simple two-star alignment before it was sent to M8. The scope was focused using a Bahtinov mask and a bright star. AstroDMx Capture for Linux was used to find and position M8. Both a Linux and a Windows computer were used to produce this article.

Click on an image to get a closer view

Focusing an alignment star with AstroDMx Capture, using a Bahtinov mask


AstroDMx Capture was then used to send the scope (mount) to M8


It can be seen that because only a simple two star alignment, using alignment stars west of the meridian, that when the mount was sent to M8, which was east of the meridian, it located M8, which was mainly off the sensor at the top left of the image.

AstroDMx Capture then took an image, plate-solved the star field, and sent an instruction via the INDI server to the mount, to centre M8 on the sensor.


AstroDMx Capture was then used to nudge the object slightly, into the position required for imaging.

Photograph of the imaging computer


An SV165 guide scope fitted with a QHY-5II-M camera was used for pulse auto-guiding with PHD2.

AstroDMx Capture then captured 40 x 90s FITS exposures of M8 with matching dark frames

Screenshot of AstroDMx Capture capturing FITS data on the Lagoon nebula


The data were calibrated, registered and stacked in Siril and then post processed in the Gimp 2.10

M8, the Lagoon nebula


The new functionality is working well and is edging towards a release of AstroDMx Capture with enhanced capabilities.