Wednesday, 3 July 2024

First light for an Altair Hypercam 533C and AstroDMx Capture

The equipment comprised a Stella Mira 66 ED APO refractor with a field flattener and Altair magnetic 2" filter holder with Altair 6nm dualband filters (Ha/OIII' SII/OIII); a  ZWO EAF and an Altair Hypercam 533C 14 bit OSC CMOS camera.  


The data were capture with AstroDMx Capture for Windows. The scope was mounted on an AVX GOTO mount which was controlled by AstroDMx Capture via an INDI server running on the imaging computer indoors.

The mount was placed on marks on the ground which quickly gives quite a good polar alignment if care is taken with the placement of the tripod feet.

An SVBONY SV165 guide scope with a natively connected QHY-5II-M guide camera was used for PHD2 multistar pulse auto-guiding via the INDI server. The auto-guiding was controlled by a separate Linux laptop indoors.

AstroDMx Capture sent the scope/mount to the star Arcturus which was used to focus the scope with a Bahtinov mask. The ZWO AEF was controlled by AstroDMx Capture via the INDI server.

The Altair Hypercam 533C OSC camera was chosen because like all Touptek derived cameras, it can produce true RAW images. That is, there are no destructive controls such as gamma and white balance applied before the data are saved. A result of this is that the RAW data have a green hue when viewed. This is perfectly normal because in the Bayer matrix of colour filters over the pixels, half of the filters are green whilst a quarter are red and a quarter are blue.

Although this can be distracting and even disappointing when previewing the data, AstroDMx Capture's non destructive DMx white balance control (which does not affect the save data) removes the green hue and correctly white balances the preview. The true RAW nature of the data means that no information has been lost during the capture process and everything has to be done during processing and post processing. An advantage of capturing RAW data is that the file size is only a third of the size of  fully debayered RGB data files. Some capture software can only capture RAW data but AstroDMx Capture gives the option of saving fully debayered, 16 bit data, and the user can choose the quality of the debayering algorithm used.

Screenshot of AstroDMx Capture capturing RAW fits files of M16, the Eagle nebula  but the non-destructive DMx white balance is turned on to correctly white balance the preview.

Capturing with the Ha/OIII dualband filter

Capturing with the SII/OIII dualband filter
Calibration frames were also captured

The two sets of data were debayered, cosmetically corrected, stacked  and partly processed in PixInsight and further processed in GraXpert, Gimp 2.10 and Starnet++.  The colour channels were decomposed to produce Ha and OIII data from one filter with SII and OIII from the other filter.

The starless OIII data were combined from both filters and composed back into various palette renderings in the Gimp. The SHO data were further selective colour processed in Photoshop CS2 and all of the palettes were post processed in the Gimp.

Two bicolour palette renderings of the Eagle nebula were made:

HOO palette


SOO palette


SHO Hubble palette


HOS, Canada, France, Hawaii telescope palette


Solar imaging
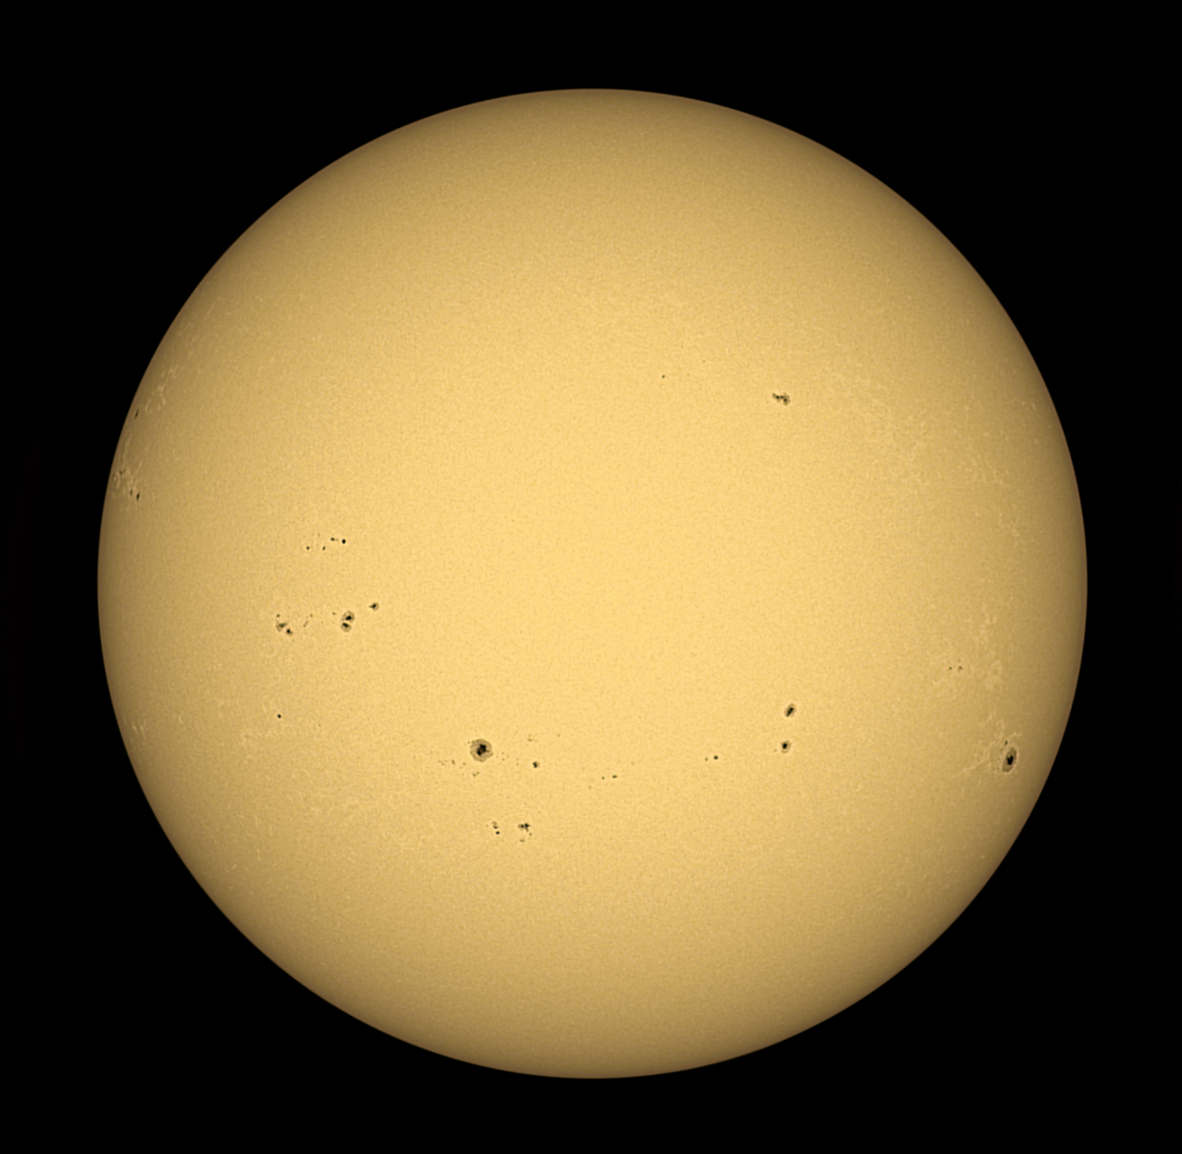
Using the same camera/scope setup with a Baader OD 3.8 solar filter and a UV/IR cut filter in the magnetic filter holder. AstroDMx Capture for Windows was used to send the scope to the Sun and to capture a 1200-frame RAW AVI of the whole solar disk.


Screenshot of AstroDMx Capture capturing RAW, 8-bit solar data


Notice the green hue of the RAW data.


Screenshot of AstroDMx Capture capturing RAW, 8-bit data but with the DMx white balance turned on


The data were debayered and the best 85% of frames stacked in Autostakkert!4, wavelet processed in waveSharp and post processed in the Gimp 2.10.\

The Sun in White Light


Sunday, 23 June 2024

Fitting a dovetail bar to a Stella Mira 66 ED APO refractor

The Stella Mira 66 ED APO doublet refractor is a serious and high quality telescope with very good colour correction. However, it doesn't have mounting rings and instead has a ridiculous mounting shoe that could be used to attach it to a photographic tripod or maybe a tracking mount; but when it comes to mounting the scope on an astronomical mount such as the Celestron AVX, the shoe is outside of all concepts of good design. It can fit into the dovetail slot and be held by just one of the two holding bolts. A result of this is that it is virtually impossible to mount the scope parallel to the polar axis as the single screw pushes the back of the shoe to the east side of the slot, pushing the front of the shoe towards the west side of the slot. Moreover, this process also tends to push the back of the mounting shoe down and slightly raise the front of the shoe. The result is a scope that is not pointing true in either axis when in the home position. Also the scope feels very precarious.

There is a Stella Mira vixen style dovetail bar to which the scope is assumed can be attached. However this is not so. The shoe cannot be mounted directly onto the dovetail bar and provide a better balance for the scope because the dovetail bar will collide with the huge focus locking device. This means that spacers have to be improvised as there are none provided for the purpose. Even though the dovetail bar is actually printed with the Stella Mira name, it is just some sort of generic bar with a slot through which attaching 1/4" UNC photographic thread bolts can pass, but is far too wide and so allows the bar to be moved from side to side even when completely tightened down.

In order to solve all of these problems I enlisted the help of a couple of packing spacers, epoxy resin and some black Sugru mouldable glue.

A year ago in another article, I described the fitting of a ZWO AEF focuser to the scope.

The bracket for the focuser had to be modified but not the scope and the fitting of the AEF in no way exacerbated the problem of fitting a dovetail bar.

A thick packing spacer was attached by Epoxy resin to the base of the mounting shoe


A thinner spacer was then attache by Epoxy resin to the first spacer to provide the desired clearance


The packing spacers provided the required clearance from the focus locking device on the right hand side. Of course this does not have to be tightened as the rack and pinion focuser is held firmly by the AEF
\

Two 1/4" UNC photographic thread 1" length hex socket head bolts were used to attach the dovetail bar to the shoe and Epoxy resin was also used between the dovetail bar and the packing spacers.


Black Sugru mouldable glue was used to pack around the screws and between the two rails of the dovetail bar. After a couple of days the Sugru has become hard so that no lateral or twisting motion is possible


The completed modification


The Stella Mira mounted on the AVX mount much further forward than was previously possible providing much improved balance with true and rigid positioning.


The scope can now function the way that we require for our work.

The modified scope in action


Monday, 27 May 2024

Star reduction procedure in Gimp 2.10

 Star reduction procedure in Gimp 2.10

The procedure followed here have been carried out on  a cropped Seestar S50 image of the bubble nebula. It is of average quality but serves nicely to demonstrate the procedure.

Animation showing the before and after star reduction


The star reduction procedure is detailed below


Tools

    Selection Tools

        By Colour Select

        In Tool Options

            Threshold 40

            Click on a star

                Select

                    Grow

                    Grow selection by 3 pixels

                Select

                    Feather

                    Feather selection by 4 pixels

                    If some nebulosity has been selected as well as stars

        Then use Free select tool with CTRL pressed and outline the area to be excluded from the selection

        Filters

            Distorts

                Value Propagate...

                    Mode More Black

       Select

       None


Note: The numbers 40, 3 and 4 in bold above will work but are guideline values that can be experimented with.


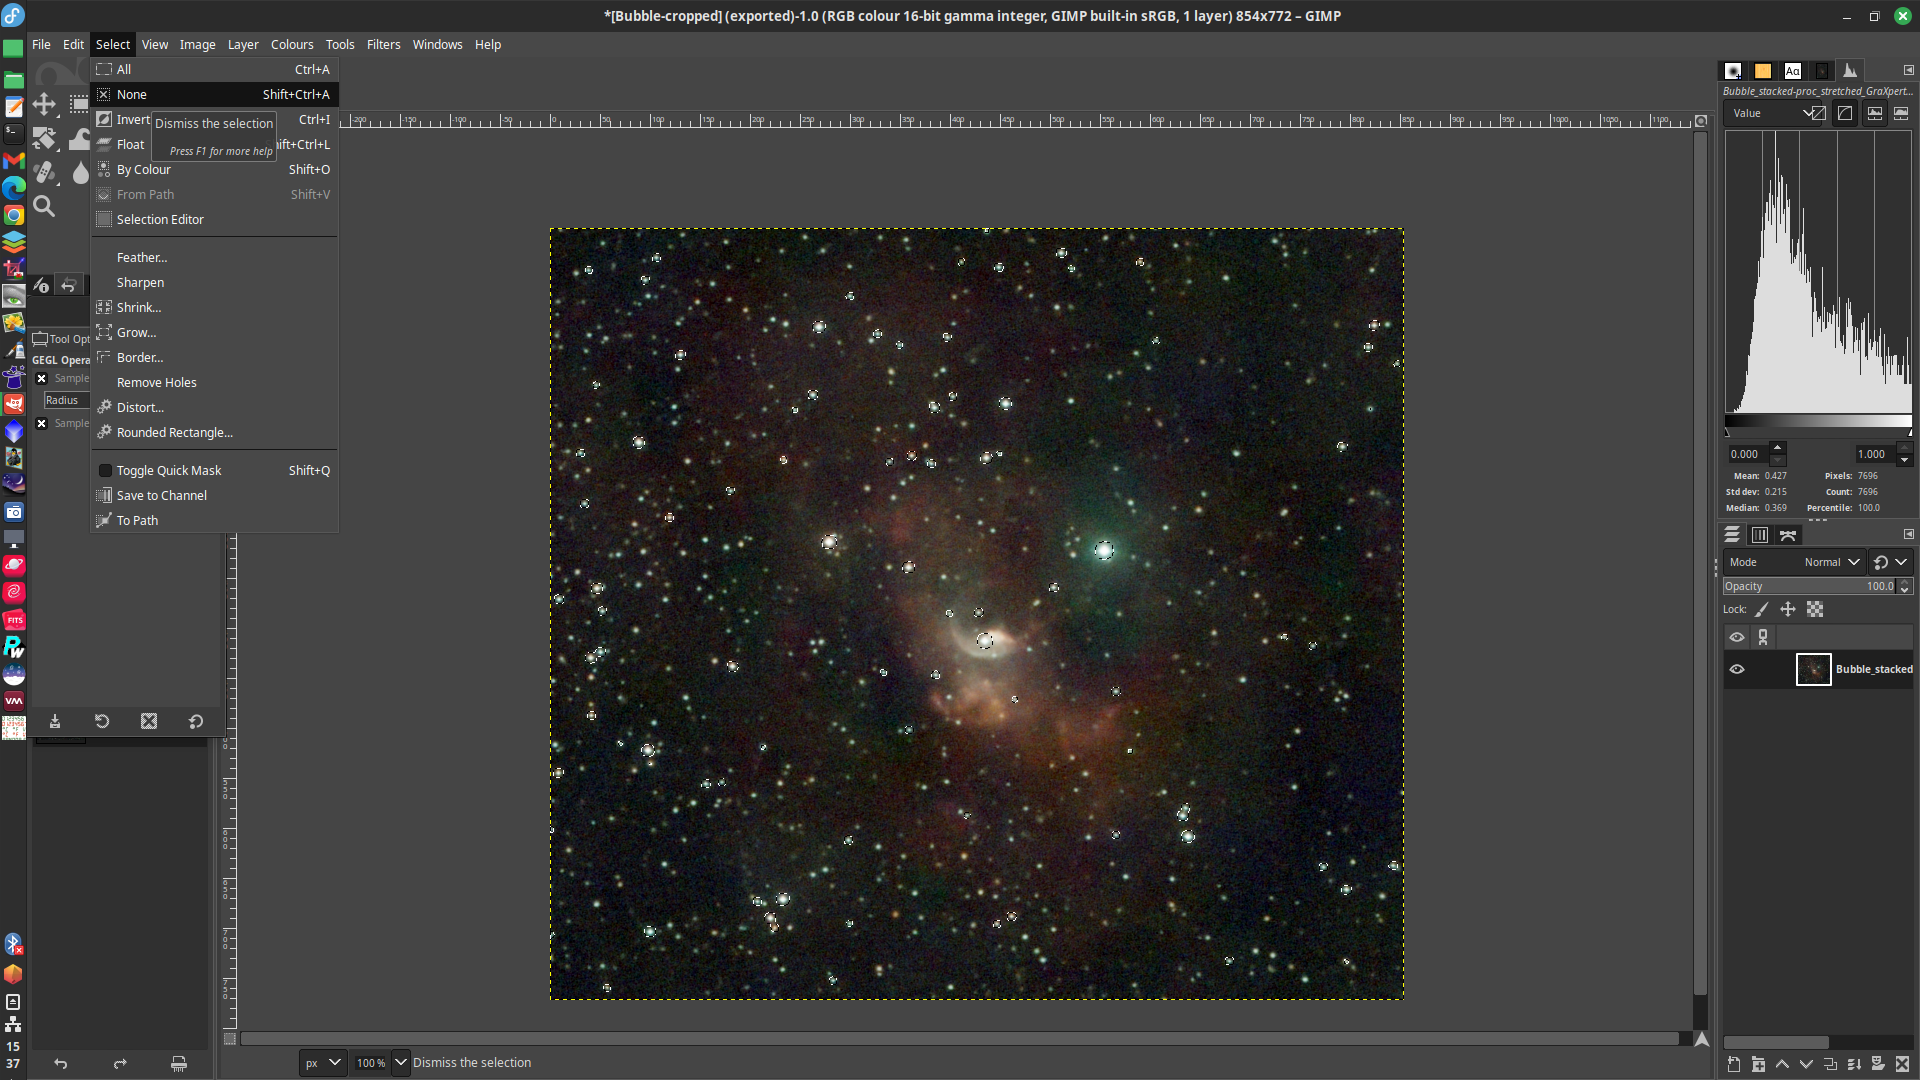
The above procedure is carried out in the Gimp and is shown by the following screenshots.

Click on a screenshot to get  a closer view


Tools > Selection Tools > By Colour Select

Threshold = 40


Click on a star to select and note that a small amount of the bubble nebulosity has also been selected
Select > Grow > Grow selection by 3 pixels


The selections have grown by 3 pixels


Select > Feather > Feather selection by 4 pixels


Use Free select tool with CTRL pressed to exclude the area of nebulosity that had been selected


Filters > Distorts  > Value Propagate


Mode > More Black


Preview disabled


Preview enabled


Select > None


Stars have been reduced


The original animation of before and after star reduction

This article was inspired by two YouTube videos, one by Ruzeen Farsad and the other on the AstroOnBudget channel

Tuesday, 21 May 2024

Feature release Version: 2.8.1 of AstroDMx Capture

 Nicola has released Version: 2.8.1 of AstroDMx Capture

Mutatis mutandis


  • Added: New and improved implementation for UVC Cameras (webcams) for macOS
  • Added: Improved crash handling. If AstroDMx Capture crashes, the user will see a message that shows a stack trace. This message can be screenshot and then sent to the developer for analysis. In addition to this, a longer stack trace is written to the log file if the application is run in debugging mode
  • Changed: Improved handling of UVC camera exposures on Windows
  • Changed: The binary (executable) names have been changed. The names now reflect the CPU microarchitecture used; for example, SSE2, SSE3, SSE4 and AVX2
  • Changed: Various minor UI improvements
  • Changed: Improvements for the manual installer for Linux
  • Changed: macOS binaries are now self-signed (this was a requirement introduced by the new UVC implementation
  • Fixed: Memory/thread leak that was accidentally introduced in 2.7.1
  • Fixed: Setting camera exposures via the “Controls: Capture Profiles
  • Fixed: macOS startup size if the application was closed whilst in full-screen mode
  • Updated: PlayerOne SDK
  • Updated: QHY SDK
  • Other bug fixes and improvements

Wednesday, 1 May 2024

Solar and Lunar imaging with the SVBONY SC432M fan-cooled CMOS camera

Nicola has implemented the SVBONY SC432M solar camera in AstroDMx Capture. It works fine but we have requested that SVBONY make certain modifications to the SDKs for all platforms to present only cooling data relevant to the camera.

The SC432M Mono Solar Camera IMX432 - Global Shutter, Large Pixels, greyscale  camera for Moon Sun and Planets. It has a silver coloured body that effectively reflects sunlight. The camera is fan cooled with the fan being powered by a USB C port connected to a 5v USB supply. This system helps to maintain the system several degrees cooler than if the cooling fan is not employed.

The 9um pixel size of the IMX432 has a well depth of 100ke with a total of 1.7MP  (the resolution is 1608*1104

The large pixel size means that it works at longer focal ratios, such as Maksutovs, SCTs and Daystar quarks. If one is using a shorter focal length telescope, a Barlow lens can be used to increase the focal length of the system

Skymax 127 modified for motor focus, fitted with a photo grade Baader solar filter (OD 3.7) and an SC432M placed at the focus.


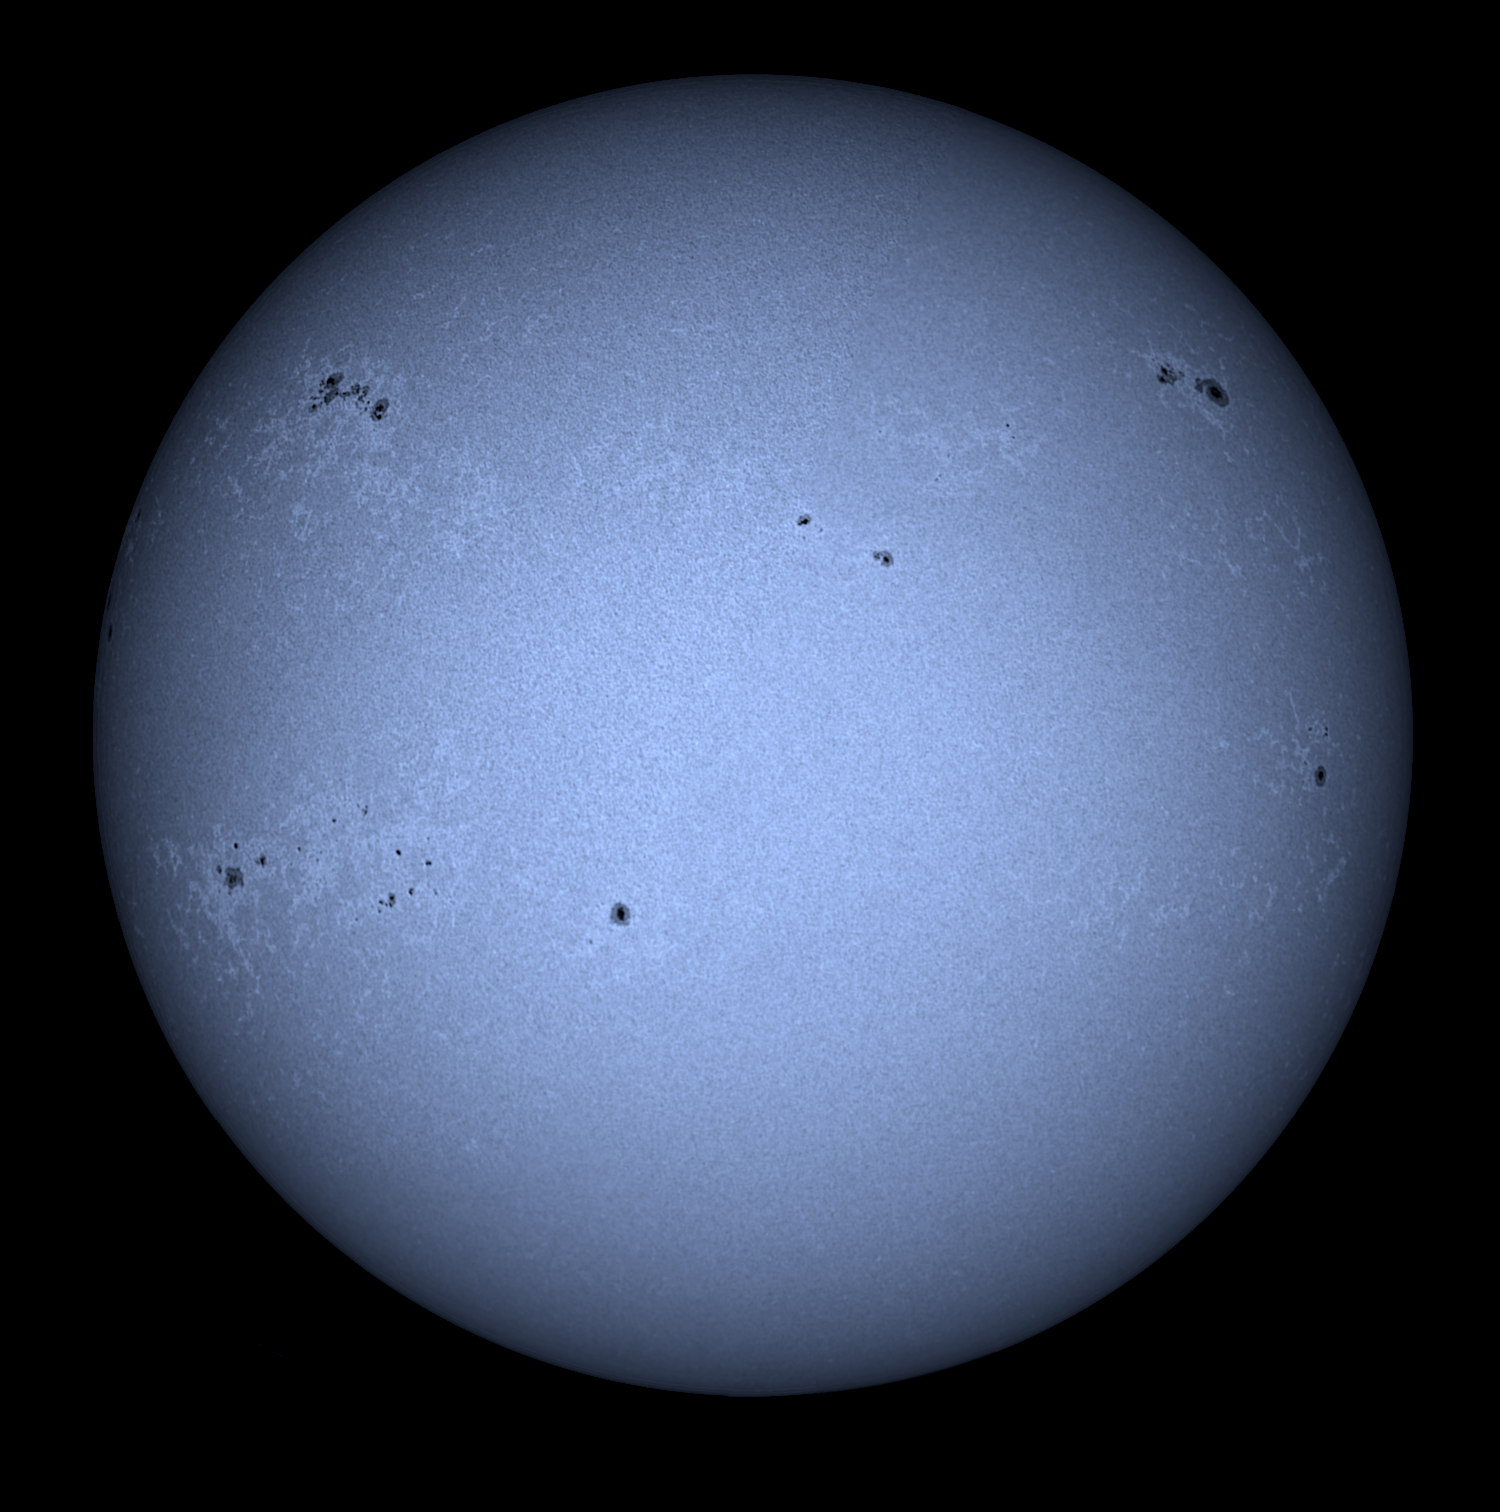
Screenshot of AstroDMx Capture streaming data from the SC432M through a Baader Ca K-line filter and the Skymax 127 + solar filter


Four overlapping 1000-frame SER files were captured, the best 90% of the frames stacked in Autostackert!, stitched in Microsoft ICE, wavelet processed in waveSharp and post processed in the GIMP 2.10.

The Sun in Ca K-line light


Closer view

The Skymax 127 fitted with a dew shield and the SC432M placed at the focus.


Two overlapping 1000-frame SER files were captured in AstroDMx Capture for Windows.


The best 90% of the frames stacked in Autostackert!, stitched in Microsoft ICE, wavelet processed in waveSharp and post processed in the GIMP 2.10.

The Moon April 16th


Two overlapping 1000-frame SER files were captured in AstroDMx Capture for Linux on the next night.


The best 90% of the frames stacked in Autostackert!, stitched in Microsoft ICE, wavelet processed in waveSharp and post processed in the GIMP 2.10.

The Moon April 17th


Closer view


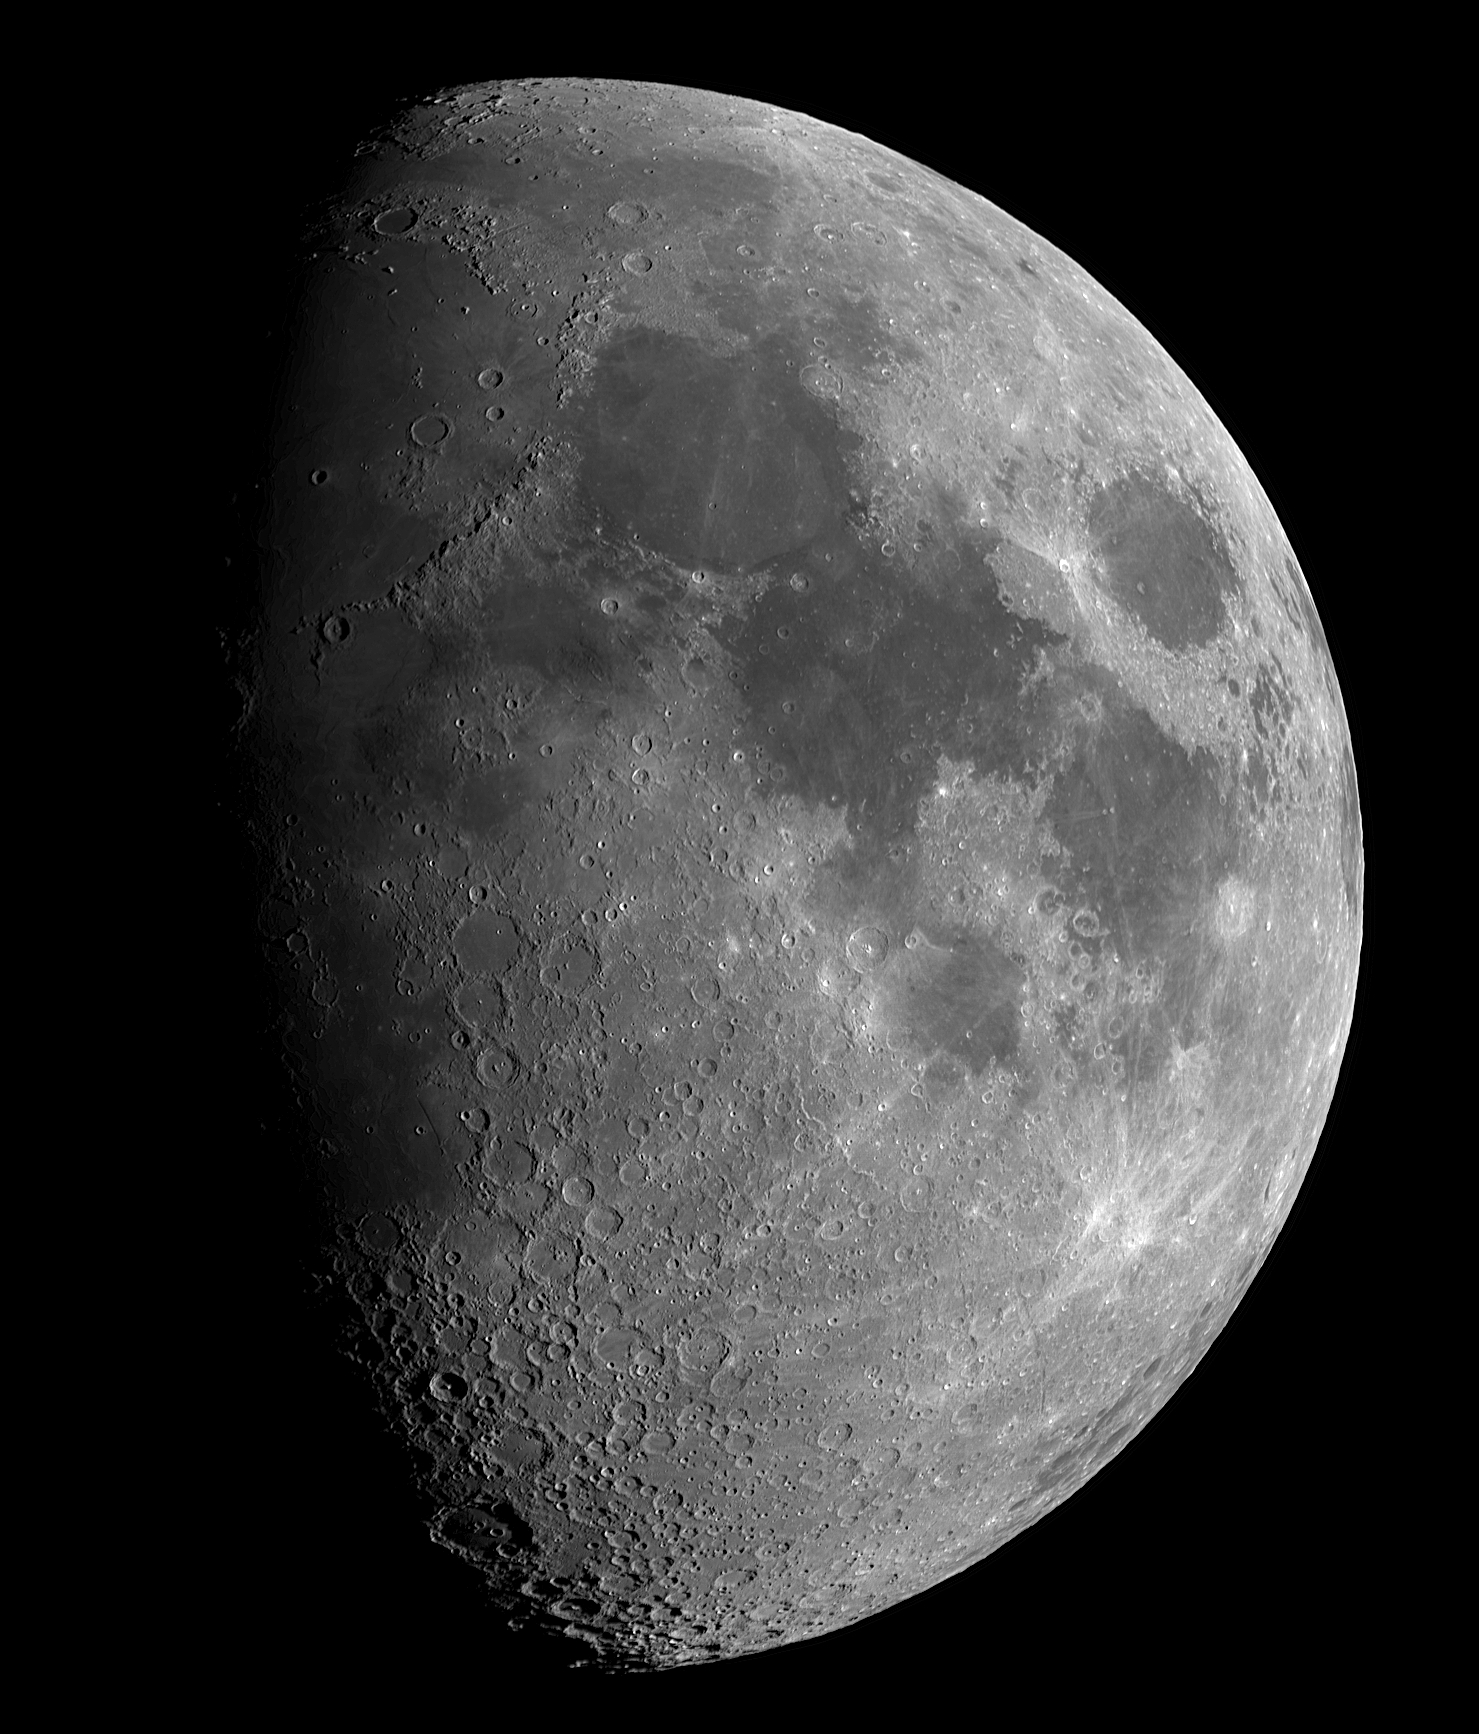
A Meade RB70 f/10 doublet refractor was fitted with a x 2 Barlow and the SC432M camera and mounted on the Celestron AVX mount. 


Four 1000 frame overlapping SER files were captured in AstroDMx Capture. The best 95% of the frames in each SER file were stacked in AutoStakkert! , stitched in Microsoft ICE, wavelet processed in waveSharp and post processed in the GIMP 2.10.

One pane of the mosaic


Final 4 pane mosaic of the Moon


A Coronado Solarmax II, 60, BF15 H-alpha scope was fitted with a x2 Barlow and the SC432M camera and was mounted on the Celestron AVX mount. A 1000 frame SER file was captured in AstroDMx Capture. 


The data were part processed in SER player, stacked in Autostakkert!, wavelet processed in waveSharp and post processed in GIMP 2.10.

The Sun in H-alpha light


Closer view


The SC432M camera was fitted with the lens from a x2 Barlow and placed at the focus of a CaK PST solar scope.


Screenshot of AstroDMx Capture for Linux capturing a 200-frame SER file in Ca K-line light using a region of interest.


The SER file was stacked in Autostakkert! , wavelet processed in waveSharp and post processed in the GIMP 2.10.

The Sun in Ca K-line light


By using a long focal length scope or using Barlow lenses, it was possible to match the camera to the scope fairly well.

The SC432M has a global shutter which means that the information from the sensor is read out instantly instead of gradually across the chip as with a rolling shutter. Zoltan Trenovszki states that a global shutter will prevent the occurrence of Newton's rings.  It is not immediately clear why a global shutter would avoid Newton's rings. However, with charge/voltage conversion in a CCD sensor, a vertical and horizontal charge transport first takes place. The serial charge/voltage conversion of all pixels takes place outside the sensor in the camera’s electronics. In contrast, the charge/voltage conversion in CMOS sensors occurs in every pixel on the sensor. This difference in charge handling could potentially contribute to the appearance of Newton’s rings in CMOS sensors.
Considering the shutter mechanism: Most CCD sensors use a global shutter, which exposes the entire image simultaneously. On the other hand, most CMOS sensors use “rolling shutters,” which expose different parts of the frame at different points in time. This difference in exposure mechanism might also play a role in the formation of Newton’s rings. 
With the SC432M we saw no sign of Newton's rings, even when using a Barlow lens which is the classical situation for causing the phenomenon. If this proves to be general, it will be a great benefit for H-alpha imaging without having to tilt the camera in the optical axis.