Making an electronic solar finder for remotely locating the Sun when the imaging computer is not outside with the imaging telescope.
Click on any image to get a closer view
In this experiment we use equipment that we have in our spares and reclaimed box.
We had a spare ZWO ASI120MC case that we reclaimed after the camera died for a second time. We mounted a USB board camera in the ZWO case and fitted a Wide angle M12 lens. The signal cable was secured in a port-hole in the camera case using Sugru moldable glue.
An alternative M12 lens was tried and it also worked
A low cost solar finder was obtained from Amazon.
This is the sort with a small hole at one end and a screen at the other end. It is mounted on the finder shoe of the scope, which should be co-aligned with the scope. When facing the Sun, a small image of the sun is projected onto the screen target at the back of the finder. When the image of the Sun is in the centre of the screen target then the Scope should be pointing directly at the Sun. The scope of course, will be fitted with a solar filter over the front of the scope.
The diameter of the solar finder is the same as the 1.25” nosepiece of the defunct ZWO camera. With superglue gel and black insulating tape, the nosepiece was attached to the back of the finder. Although a strong joint, it is an easy matter to break the components apart without causing any damage.
The assembly is screwed into the camera case and the camera lens focus is tweaked until the target screen on the rear of the finder is in focus when pointing towards a source of light.
The setup
The scope was already in focus from a previous deep sky imaging session with the quadband filter so the EAF was not powered up.
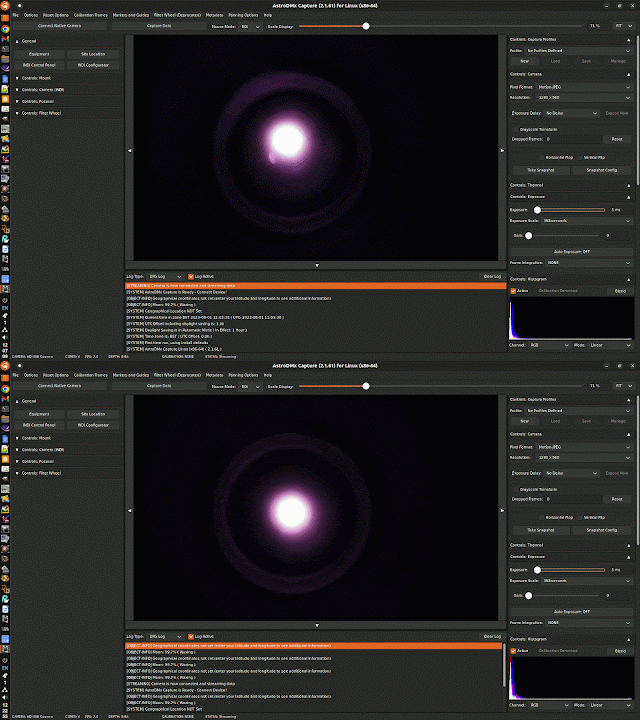
Two instances of AstroDMx Capture were launched in different workspaces (desktops). One streamed data from the SV405CC camera. The other streamed data from the UVC camera in the electronic solar finder.
The scope/mount was sent to the Sun and could be seen in the solar finder camera but not centred. The mount was adjusted to bring the image of the Sun in the solar finder into the centre of the target.
The following animation shows the Sun off centre and then centred after nudging the mount.
The Sun was now in the centre of the field of view of the imaging scope. Both instances of AstroDMx Capture can be see in this screenshot of the 4 workspaces of the Linux imaging machine.
A Region of interest was drawn around the Sun and applied to give a larger scale to the Sun and improve the frame rate.
AstroDMx Capture was used to capture a 2000 frame SER file of the Sun.
The best 50% of the frames in the SER file were stacked in Autostakkert! , Wavelet processed in Registax 5.1 and post-processed in the Gimp 2.10
The Sun
The concept clearly worked and it was possible to use a simple UVC USB 2.0 camera in the electronic solar finder.
Using an Altair guide camera as the camera in the electronic solar finder.
The reason for varying the electronic solar finder setup is that most astronomical imagers will have a guide camera whilst they may well not have a UVC camera. Also, it was possible to use cheap items with which to construct the finder.
We removed the lens from a low cost barlow and attached it with superglue gel and black insulating tape to the back of the solar finder.
The Altair GP-CAM 225C guide camera was fitted with a low cost lens and the camera could slide into the barlow tube end of the system.
The focus of the camera is tweaked to bring the target screen into focus
Similarly, the remounted UVC USB camera can also be mounted to the finder
The concept works well and it allows the mount to be remotely controlled from an imaging computer indoors, locate and centre the sun in the electronic solar finder, and centre the Sun in the co-aligned imaging scope and camera.
This project is ideal for a 3D printing project in which a tube of appropriate thickness and length could be pushed over the rear end of the solar finder and could be of appropriate diameter to allow the insertion of a guide camera with a lens into the other end, Both ends could be tapped for using plastic thumb screws to secure the tube to the finder at the one end, and the camera to the tube at the other end.
Indeed, the whole finder system could be 3D printed rather than adapting a solar finder as we have done here.


