Wednesday, 30 August 2023

Seeking the Soap Bubble nebula

The Soap Bubble planetary nebula (PN G75.5+1.7) is not an obvious, or easy object to see or image. It lies quite close to the Crescent nebula in Cygnus and yet was only discovered in 2007 by amateur astronomer Dave Jurasevich using an Astro-Physics 160 mm EDF air-spaced triplet apochromatic refractor .

He imaged the nebula on June 19, 2007 at f/7.7 and again on July 6, 2008 at f/5.7. 

On July 26, 2013 the Centre de DonnĂ©es Astronomiques de Strasbourg (CDS), the world referenece database for the identification of astronomical objects  officially designated PN G75.5+1.7 as Ju1 (Jurasevich 1).

The central coordinates of the Soap Bubble nebula are RA. = 20h15m22.2s, DEC. = +38d02'58" (J 2000)

The star HD 228550 is closely adjacent to the Soap Bubble nebula. The star HD192537 is mid way between the Soap Bubble nebula and the Crescent nebula.

We made a first attempt at imaging the Soap Bubble nebula with AstroDMx Capture using a William Optics Super Zenithstar 81mm ED Doublet APO refractor at f/5.5 with x0.8 flattener/reducer fitted with an Altair magnetic filter holder version 2 containing an Altair Quadband filter. The camera used was an SV405CC 14 bit, cooled OSC CMOS camera.

The equipment used


As usual, the mount was placed on marks on the ground which gives a good polar alignment when care is taken with the placement of the tripod feet.

PHD2 was used for multi-star pulse auto-guiding and was controlled by a separate Linux computer indoors.

Screenshot of the PHD2 auto-guiding computer


AstroDMx Capture captured the data, controlled the mount and the ZWO EAF via an INDI server running on the imaging computer indoors.

AstroDMx Capture was used to send the scope/mount to Altair; with plate-solving to centre the star. The scope was then focused using a Bahtinov Mask.


AstroDMx Capture was used to send the scope/mount to the star HD 228550 (close to the Soap Bubble nebula), automatically, repeatedly plate solve and move until an accuracy of 5 arc-seconds was achieved,

AstroDMx Capture was used to capture 1.5 hours worth of 5 minute exposures of the Soap Bubble region.


The Crescent nebula is visible on the preview screen as well as some general nebulosity.

Dark frames, Flatfields, Dark-flats and Bias frames were also captured during the session.

The Quadband filter used

The Altair Quadband OSC narrowband filter transmits two spectral bands: 

FWHM spans 477.5nm - 512.5nm at the blue-green end of the visible spectrum and FWHM spans 642.5nm - 677.5nm at the red end of the spectrum.

The first band contains the emission lines of H-beta at 486.1nm and OIII at 495.9nm and 500.7nm and is centred on 495nm.

The second band contains the emission lines of H-alpha at 656.3nm and SII at 672.4nm and is centred on 660nm.

The Filter is called ‘Quadband’ because it transmits the emission lines of these four elements.

Each of the two transmission bands has a FWHM of 35nm and the rest of the visible spectrum is essentially blocked.

The data were calibrated and stacked in Deep Sky Stacker. The Starnet++ Gimp plugin was used to remove the stars and the resulting image was decomposed into the 3 RGB channels. The Blue and Green channels were merged to produce a synthetic O channel and the Red channel that would also cntain any SII data was used as a synthetic H channel. The two synthetic channels were stretched to reveal as much of the captured nebulosity as possible. The channels were re-composed as a synthetic HOO image, which was post processed in the Gimp 2.10 and Neat Image.

Synthetic HOO image of the Soap Bubble region


The Soap Bubble nebula is by no means easy to spot, however it contains a characteristic group of six stars which verify its location.

Diagrams of the Soap Bubble nebula


Animation showing the location of the Soap Bubble nebula  (PN G75.5+1.7) in the above image


With the aids used above, it is just possible to make out the Soap Bubble nebula amongst all of the local nebulosity.

The data used here comprise One and a half hour’s data comprising 5 minute exposures.

However, Dave Jurasevich first imaged the Soap Bubble nebula on July 19, 2007 with a single 30 minute exposure using an SBIG STL - 11000 M CCD camera and his 160mm refractor at f/7.7 using a 6nm H-alpha filter.

Subsequently, on July 5, 2008 using the same equipment but at f/5.7 he imaged the nebula using 4 hour’s worth of data comprising 12 x 20 minute exposures.

In future attempts to image the nebula we shall use an SV605MC mono, cooled, 14 bit CMOS camera and a 7nm Altair H-alpha filter.


Tuesday, 22 August 2023

Further testing of the release version of AstroDMx Capture Version 2.2.1

Equipment used

Click on an image to get a closer view

The equipment comprised a Stella Mira 66 ED APO refractor with a field flattener, an Altair magnetic 2" filter holder with an Altair Quadband filter; a  ZWO EAF and a SV405CC OSC 14 bit TEC cooled CMOS camera, using an SVBONY SV165 guide scope with a QHY-5II-M guide camera. The equipment was mounted on a Celestron AVX mount.

Black felt cover for the filter holder 

Moving the cover away allows for filter changing.

Black felt cover over the filter holder

The cover prevents stray light from any source from entering the mainly light-tight filter holder as extra protection.

Imaging computer indoors running Ubuntu Cinnamon Linux


The work involved collecting data on three different nights and in some cases combining the images into mosaics even though there had been some camera rotation between sessions.

As usual, the mount was placed on marks on the ground which gives a good polar alignment when care is taken with the placement of the tripod feet.

PHD2 was used for multi-star pulse auto-guiding and was controlled by a separate Linux computer indoors.

Screenshot of the PHD2 auto-guiding computer


AstroDMx Capture captured the data, controlled the mount and the ZWO EAF via an INDI server running on the imaging computer indoors.

AstroDMx Capture was used to send the scope/mount to Altair; with plate-solving to centre the star. AstroDMx Capture then controlled the ZWO EAF via the INDI server to exactly focus the star using a Bahtinov mask.


In the previous blog article we described the capture of data on the Western Veil nebula and Pickering’s Triangle. Here we collect data on the Eastern Veil nebula by centering the image on the star HD 199042. The reason for using ths star was to frame the image to combine with the Western Veil and Pickering’s triangle as a mosaic. It would not have produced the required mosaic if we had simply centred on the offcial coordinates of the Eastern Veil nebula. The official coordinates of many deep sky objects are in what often seem to be illogical locations. For this reason we frequently use a star around which to frame a deep sky object. 

AstroDMx Capture was used to send the scope/mount to the star HD 199042, automatically, repeatedly plate solve and move until an accuracy of 5 arc-seconds was achieved, placing the Eastern Veil nebula in the required position in the field of view.

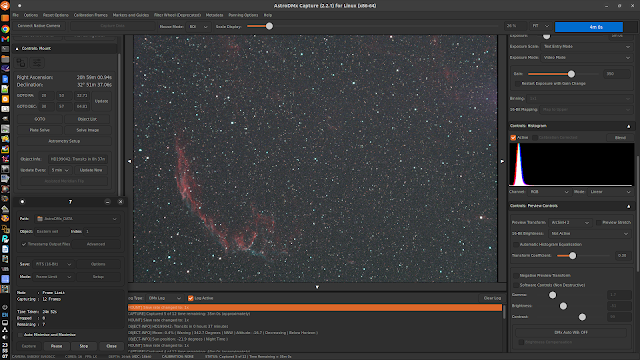
Screenshot of AstroDMx Capture capturing 1 hour’s worth of 5 minute exposures of the Eastern Veil, nebula

Darks. Flats and dark flats were also captured.

With a negative preview

The data were calibrated and stacked in Deep Sky Stacker and post processed in the Gimp 2.10, Starnet++ Gimp plugin Siril and Neat Image.

The Eastern Veil nebula

Microsoft ICE was used to combine the Eastern Veil nebula and the Western Veil nebula from the previous blog post into a single mosaic image. Then any residual gradients were removed with GraXpert.

The Eastern and Western Veil nebulae and Pickering’s Triangle mosaic image


AstroDMx Capture was used to send the scope/mount to the star HD189777 within Sharpless 101, the Tulip nebula.

Screenshot of AstroDMx Capture capturing 1 hour’s worth of 5 minute exposures of the Tulip nebula


With a negative preview


The data were calibrated and stacked in Deep Sky Stacker and post processed in the Gimp 2.10, Starnet++ Gimp plugin Siril and Neat Image.

Sharpless 101, the Tulip nebula.


AstroDMx Capture was used to send the scope/mount to the star HD 199870 within NGC 7000, the North America nebula.

Screenshot of AstroDMx Capture capturing 1 hour’s worth of 5 minute exposures of the North America nebula


With a negative preview


The data were calibrated and stacked in Deep Sky Stacker and post processed in the Gimp 2.10, Starnet++ Gimp plugin Siril and Neat Image.

NGC 7000, the North America nebula. 


AstroDMx Capture was used to send the scope/mount to the star HD 198639 within The Pelican nebula

Screenshot of AstroDMx Capture capturing 1 hour’s worth of 5 minute exposures of the Pelican nebula


With a negative preview


The data were calibrated and stacked in Deep Sky Stacker and post processed in the Gimp 2.10, Starnet++ Gimp plugin Siril and Neat Image.

The Pelican Nebula


Microsoft ICE was used to combine the North America nebula and the Pelican nebula into a single mosaic image. Then any residual gradients were removed with GraXpert.

The North America nebula and the Pelican nebula mosaic image


The SV405CC camera performed well with Version 2.2.1 of AstroDMx Capture and the Stella Mira 66 ED APO refractor with a field flattener, an Altair magnetic 2" filter holder with an Altair Quadband filter.

The new and modified INDI controls in AstroDMx Capture worked without any problems

AstroDMx Capture for all platforms can be downloaded HERE.

Tuesday, 8 August 2023

The Eagle and Veil nebulae with the latest version of AstroDMx Capture.

This work was done with the latest feature-release version 2.2.1 of AstroDMx Capture.

The equipment comprised a Stella Mira 66 ED APO refractor with a field flattener, an Altair magnetic 2" filter holder with an Altair Quadband filter; a  ZWO EAF and a SV405CC OSC 14 bit TEC cooled CMOS camera, using an SVBONY SV165 guide scope with a QHY-5II-M guide camera. The equipment was mounted on a Celestron AVX mount.

As usual, the mount was placed on marks on the ground which quickly gives quite a good polar alignment when care is taken with the placement of the tripod feet.

PHD2 was used for multi-star pulse auto-guiding and was controlled by a separate Linux computer indoors.


AstroDMx Capture captured the data, controlled the mount and the ZWO EAF via an INDI server running on the imaging computer indoors.

AstroDMx Capture was used to send the scope/mount to Altair; with plate-solving to centre the star. AstroDMx Capture then controlled the ZWO EAF via the INDI server to exactly focus the star using a Bahtinov mask.

AstroDMx Capture was used to send the scope/mount to the Eagle nebula, automatically repeatedly plate solve and move until an accuracy of 5 arc-seconds was achieved.

AstroDMx Capture was used to capture 1 hour’s worth of 5 minute exposures of M16, the Eagle nebula.


With negative preview


The data were calibrated, registered, stacked and part processed in Siril; post processed in The Gimp 2.10, Starnet++, Neat image and PhotoScape X Pro.

The nebula was processed with the stars removed so that the stars would not become bloated during stretching.

Starless Eagle nebula


Final image of M16, the Eagle nebula


AstroDMx Capture was used to plate solve and send the mount to the star HD 198330 a star that lies among the Veil nebulae and allowed us to frame the image in the required way. The field of view was automatically repeatedly plate solved and moved until an accuracy of 5 arc-seconds was achieved with HD 198330 dead centre.

AstroDMx Capture was used to capture 1 hour’s worth of 5 minute exposures of the Western Veil nebula and Pickering’s triangle.


With a negative preview


The data were calibrated, registered, stacked and part processed in Siril; post processed in The Gimp 2.10, Starnet++, Neat image and PhotoScape X Pro.

The nebulae were processed with the stars removed.

Starless nebulae


Final image of the Western Veil nebula and Pickering’s triangle


The SVBONY SV405CC camera performed well with the latest version of AtroDMx Capture.

Nicola will be working on PHD integration in AstroDMx Capture to further automate the process of moving the mount to another object or performing an assisted meridian flip.

She will also be working on other aspects as well, and some of them should find themselves in the next feature release.


Monday, 7 August 2023

Feature release of Version 2.2.1 of AstroDMx Capture.

We are pleased to announce that Nicola has released Version 2.2.1 of AstroDMx Capture.

Mutatis mutandis

Changes

Added: Astrometry.net platesolver

Added: ASTAP automatic field of view

Added: Independent instances of AstroDMx. Two separate instances of AstroDMx Capture can now be run and each is fully independent. That is to say, each instance can have its own settings and configuration

Added: RA/DEC hints for Astrometry

Added: Assisted meridian flip functionality. When AstroDMx detects that a meridian flip is due, the user is alerted and can then perform a meridian flip. Once the flip is complete, Astrometry is automatically run to make sure that the mount is still pointing at the correct coordinates

Added: Telescope selector dialog. After successfully connecting to a camera, a window appears which asks the user which telescope is being used. This information is appended to the capture log and is used for astrometric calculations. This window can be dismissed and hidden if not required

Added: Information pertaining to the current position of the Sun and Moon are now written to the status window at the bottom of the application. This information shows the current level of darkness. For example, daylight, civil twilight, nautical twilight, astronomical twilight and nighttime (darkness). The user’s geographical coordinates need to be entered for this functionality

Added: Filter wheel name is appended to the file name. An INDI filter wheel needs to be connected for this functionality

Added: The object’s RA/DEC coordinates are added to the FITS metadata. AstroDMx must be connected to a mount for this functionality to work

Improvements: Significant improvements to the astrometric functionality. For example, the plate solver will now continuously run until a user defined accuracy has been met or the maximum number of solves has been reached. For more information please see the release notes

Improvements: Improvements have been made to INDI focuser devices

Improvements: Improvements have been made to all FITS metadata. Telescope aperture and focal length are now written together with other important information. FITS metadata can either be populated automatically (assuming that the values are available) or entered manually by the user

Changes: Significant changes have been made to the way that mouse dragging functions. For more information, please see the release notes

Updated: SVBONY SDK

Updated: PlayerOne SDK

Updated: QHY SDK

Updated: Atik SDK

Bug fixes and other improvements

AstroDMx Capture for all operating systems can be downloaded HERE.

Tuesday, 1 August 2023

Making an electronic solar finder for remotely locating the Sun

Making an electronic solar finder for remotely locating the Sun when the imaging computer is not outside with the imaging telescope.

Click on any image to get a closer view


In this experiment we use equipment that we have in our spares and reclaimed box.

We had a spare ZWO ASI120MC case that we reclaimed after the camera died for a second time. We mounted a USB board camera in the ZWO case and fitted a Wide angle M12 lens. The signal cable was secured in a port-hole in the camera case using Sugru moldable glue.

An alternative M12 lens was tried and it also worked


A low cost solar finder was obtained from Amazon.


This is the sort with a small hole at one end and a screen at the other end. It is mounted on the finder shoe of the scope, which should be co-aligned with the scope. When facing the Sun, a small image of the sun is projected onto the screen target at the back of the finder. When the image of the Sun is in the centre of the screen target then the Scope should be pointing directly at the Sun. The scope of course, will be fitted with a solar filter over the front of the scope.

The diameter of the solar finder is the same as the 1.25” nosepiece of the defunct ZWO camera. With superglue gel and black insulating tape, the nosepiece was attached to the back of the finder. Although a strong joint, it is an easy matter to break the components apart without causing any damage.


The assembly is screwed into the camera case and the camera lens focus is tweaked until the target screen on the rear of the finder is in focus when pointing towards a source of light.


The completed electronic finder was  mounted on the finder bracket of the Stella Mira 66 ED APO refractor. The refractor was also fitted with an Altair magnetic 2" filter holder with an Altair Quadband filter which will transmit the important wavelengths in solar radiation; a  ZWO EAF and a SV405CC OSC 14 bit camera. In this experiment the camera was not cooled. The scope was fitted with an 82mm ICE ND 100000 filter.

The setup


The scope was already in focus from a previous deep sky imaging session with the quadband filter so the EAF was not powered up.

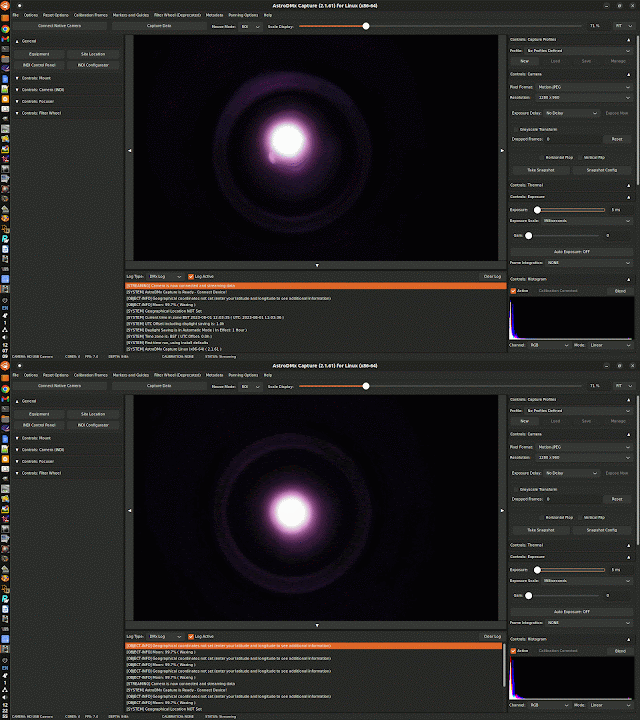
Two instances of AstroDMx Capture were launched in different workspaces (desktops). One streamed data from the SV405CC camera. The other streamed data from the UVC camera in the electronic solar finder.

The scope/mount was sent to the Sun and could be seen in the solar finder camera but not centred. The mount was adjusted to bring the image of the Sun in the solar finder into the centre of the target.

The following animation shows the Sun off centre and then centred after nudging the mount.


The Sun was now in the centre of the field of view of the imaging scope. Both instances of AstroDMx Capture can be see in this screenshot of the 4 workspaces of the Linux imaging machine.


A Region of interest was drawn around the Sun and applied to give a larger scale to the Sun and improve the frame rate.

AstroDMx Capture was used to capture a 2000 frame SER file of the Sun.

The best 50% of the frames in the SER file were stacked in Autostakkert! , Wavelet processed in Registax 5.1 and post-processed in the Gimp 2.10

The Sun


The concept clearly worked and it was possible to use a simple UVC USB 2.0 camera in the electronic solar finder. 

Using an Altair  guide camera as the camera in the electronic solar finder.

The reason for varying the electronic solar finder setup is that most astronomical imagers will have a guide camera whilst they may well not have a UVC camera. Also, it was possible to use cheap items with which to construct the finder.

We removed the lens from a low cost barlow and attached it with superglue gel and black insulating tape to the back of the solar finder.


The Altair GP-CAM 225C guide camera was fitted with a low cost lens and the camera could slide into the barlow tube end of the system.


The focus of the camera is tweaked to bring the target screen into focus

Similarly, the remounted UVC USB camera can also be mounted to the finder


The concept works well and it allows the mount to be remotely controlled from an imaging computer indoors, locate and centre the sun in the electronic solar finder, and centre the Sun in the co-aligned imaging scope and camera.

This project is ideal for a 3D printing project in which a tube of appropriate thickness and length could be pushed over the rear end of the solar finder and could be of appropriate diameter to allow the insertion of a guide camera with a lens into the other end, Both ends could be tapped for using plastic thumb screws to secure the tube to the finder at the one end, and the camera to the tube at the other end.

Indeed, the whole finder system could be 3D printed rather than adapting a solar finder as we have done here.

Final Version of the Electronic solar finder

A Bresser HD Moon and Planetary camera was fitted with a 2.1 mm CCTV lens

This camera + lens fits snugly into the barlow housing part of the finder


No doubt other cameras could be used and other means of attaching to the solar finder could be devised, but the concept works and such a device can be used to remotely locate and centre the Sun in an imaging setup.