Comet stacking with Deep Sky Stacker
This article is to show how to do all three types of comet stacking with Deep Sky Stacker.
Unfortunately I only have some mediocre data on Comet C/2117 K2 (Panstarrs) so the final result is not as pleasing as I would have wished. Nevertheless the data serve to illustrate how to do comet stacking.
The images were captured with a zero amp glow camera attached to an average quality refractor. Calibration frames could have been used if they were required.
It should be noted that it is not possible to take any short-cuts and still have the method work.
Click on any image to get a closer view
Below is an image of the DSS menu located at the left of the application window.
The first thing to do is to select Open Picture files (light frames) and upload them into Deep Sky Stacker.
Then click on Check all to select all of the picture files
Then click on the Comet tab and select the type of stack you wish to do. Here we have selected Stars + Comet Stacking
Then click on Register Checked Pictures and make sure that Stack after registering is NOT checked.
Select the first image in the list as shown by the arrow below
Then use the sliders at the top right of the application window to make the image (in particular the comet) visible
We hold down Shift and move the cursor over the comet. How good the position selection is can be seen in the small window at the top left of the preview screen. The selection cursor is green and a message is shown by the cursor that says 'Click to set the comet here'. When you are satisfied that the selection cursor is positioned correctly, then left Click.
When you have left clicked, the cursor changes to a purple circle around the comet nucleus and the message changes to 'Click to remove the comet'. Only click on this if you think you need to select the comet nucleus better than you have. If you do click on it, the cursor will change back to the selection cursor.
Close up of the selection cursor
Close up of the selected comet cursor
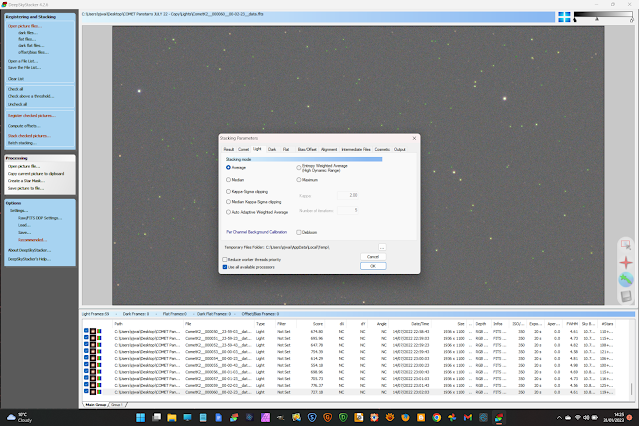
When you have clicked on the comet's nucleus and got a purple circle around it, then click on the disk drive icon to save details of the stars and comet position for this image. Then select the next image and repeat the process, remembering to click on the disk drive icon once the comet position has been selected. Repeat this process for every image in the list.At this point select Settings within Options and select Stacking settings. Click on the Light tab and select Kappa Sigma clipping as the method of combining the images, although you may have to experiment with this setting. This setting can eliminate some possible artifacts...png)
.png)
Click on Stack checked pictures, then click on OK.
Deep Sky Stacker will then compute offsets:
And then automatically proceed to stack the images according to the Comet stacking method chosen.
Be patient when it is stacking both comet and stars. It can take some time depending on the computer you are using. Take the dog for a walk or go and make a cup of tea. Eventually it will finish!
When stacking has completed for the first method, you can click on Open Picture files and dismiss the folder you will be presented with. Then just at this point you can select Settings within Options and select Stacking settings. Then click on the Comet tab and select the type of stack you wish to do.
Comet and stars stacking
Comet stacking
Regular (stars) stacking
When stacking is complete, a file called autosave.tif will have been saved in the Light Images folder. This is a 32 bit stack of the images, which can then be stretched and processed in other software.
Note, it is possible to set the autosaved file to be a FITS file, but I have elected to save the final 32 bit image as a TIF.
Comet + stars stack with no trailing of comet or stars
If you stack by all three methods, three autosave.tif files will be saved; one for each method and numbered so that they are not overwritten.
Comet stack with the stars trailed
Regular stars stack with the comet trailed
Using the Stars + Comet stacked image and the Stars stacked image, and using a technique of star-removal with StarNet++ V2 , star addition and image blending, I produced this final image without artefacts.


.png)
.png)
.png)
.png)
.png)
.png)

.png)
.png)
.png)
.png)

.png)

.png)
.png)
.png)
.png)
.png)
.png)


