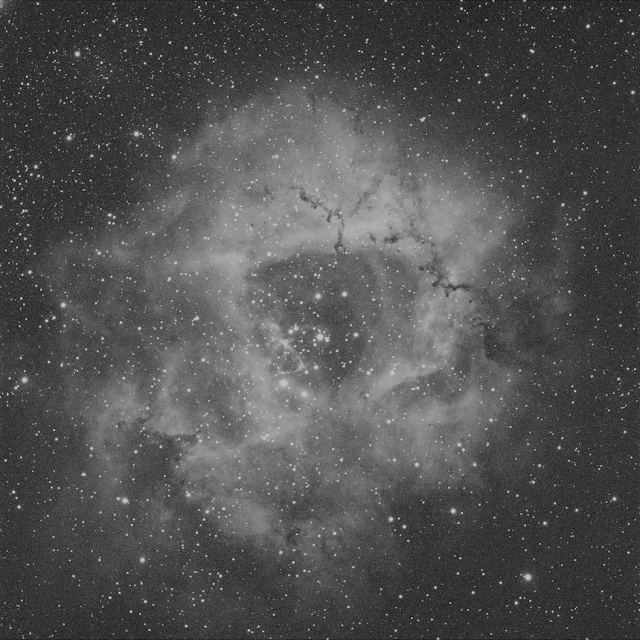
The Rosette nebula was imaged with AstroDMx Capture, a William Optics Super Zenithstar 81mm ED Doublet APO refractor at f/5.5 with x 0.8 reducer/flattener, (F=445.5mm) and an SVBONY SV605MC monochrome, cooled CMOS camera fitted with a 7nm H-alpha, or a 6.5nm OIII filter. 6 x 5min exposures were captured with each filter, giving 1 hour total exposure time.
Nicola has implemented two additional preview stretching functions that are more aggressive than those already present, to facilitate the visualisation of dim objects being imaged.
Click on an image to get a closer view
AstroDMx Capture capturing FITS data in H-alpha light
AstroDMx Capture capturing FITS data in OIII light
The data were stacked and partly processed in Siril and post processed in the Gimp 2.10, Neat image and Starnet++ v2.
Making bicolour images
The raw data are stacked monochrome images captured through either a H-alpha or an OIII narrowband filter.
To have a colour image it must have RGB colour channels. The question is: What must be mapped to the RGB channels to produce a false colour, bicolour image?
The test example here is the Rosette nebula with 6 x 5min exposures through a H-alpha filter and 6 x 5min exposures through an OIII filter.
The monochrome images have been stretched by curves to produce images of approximately the same brightness.
H-alpha monochrome image
OIII monochrome image
The simplest way of constructing a bicolour image is to use the HOO, RGB method; that is Halpha is mapped to Red and OIII is mapped to both Green and Blue channels. Then the colour balance and saturation are adjusted to produce a neutral dark background and distinctly coloured mid tones.
HOO image
Other methods of bicolour image construction involve the making of a synthetic green channel.
One way to do this is to simply blend the H-alpha and OIII monochrome images 50% each and adjust the curves so that this synthetic green channel has approximately the same brightness as the H-alpha (Red) and OIII (Blue) channels. The synthetic green channel is effectively the mean of the Red and Blue channels.
This method could be called the HO(meanHO) method.Then the colour balance is adjusted to produce a neutral dark background and distinctly coloured mid tones.
The three monochrome images are used to compose an RGB image.
Then the colour balance and saturation are adjusted to produce a neutral dark background and distinctly coloured mid tones.
HO(meanHO) image
Another way of constructing a synthetic green is to paste the OIII monochrome image onto the H-alpha monochrome image as a new layer and to combine them by using the multiply method. The resulting synthetic green image is flattened and curves are used to bring the brightness of the synthetic green monochrome channel to approximately the same brightness as the OIII and H-alpha monochrome channels.
This method could be called the HO(multiplyHO) method. Then the colour balance and saturation are adjusted to produce a neutral dark background and distinctly coloured mid tones.
The three monochrome images are used to compose an RGB image.
Then the colour balance is adjusted to produce a neutral dark background and distinctly coloured mid tones.
HO(multiplyHO) image
In the HOO method, the blue (OIII) channel was also used as the green channel.
In the HO(meanHO) and HO(multiplyHO) methods the red channel is combined with the blue channel in different ways to produce a synthetic green channel. The justification for doing this is that a green channel is required to produce the final false colour bicolour image.
It therefore seems reasonable to blend the results of all three methods to produce a sort of average bicolour image.
Bicolour blend image
As each of these methods is equally valid, it is the personal preference of the imager to choose between them.
One final thing to be done is to remove the stars with software such as Starnet++v2 and de-noise with software such as Neat Image.
Stars removed and de-noised
Subtracting the original starless image from the bicolour blend image gives an image of the stars which can then be saturation-reduced to reduce the false colour of the stars.
Extracted stars
Levels are then applied to enhance the starless, de-noised image.
Enhanced, starless, de-noised image
The stars are then added back to produce the final image.
Final Bicolour image
Of course, the star removal, de-noising and nebula enhancement could have been done for any of the bicolour images with some likely concomitant improvement. I left it until the end because I elected to use a blend of all three methods of making bicolour images.
Using similar techniques, a bicolour image was produced
Thor's Helmet
Nicola is now tidying up some loose ends before making a release of Version 2 of AstroDMx Capture.


