Preventing the primary mirror from misting up in cold weather
and the prevention of the ingress of light at the base of the scope.
The telescope used here is a Celestron Omni XLT 150 f/5 Newtonian.
click on an image to get a closer view.
Whilst the mirror is at the bottom of a long tube, the bottom of the mirror is very close to the outside environment and it is likely that it can cool rapidly from the bottom outside. Protecting the mirror from losing excessive heat from the back of the mirror can be addressed in a number of ways. I have written about this previously HERE, but I shall revisit the issue here, as well as other things that prepare the telescope for astronomical imaging. The first stages are illustrated using a Skywatcher Explorer 130 PDS 130mm, f/5 Newtonian from a previous blog.
A rubberised cover is often at the back of the primary mirror by the manufacturer.
Illustrated by a Skywatcher Explorer 130 PDS 130mm, f/5 Newtonian

A disk of polystyrene is cut and fitted over the black layer
Illustrated by a Skywatcher Explorer 130 PDS 130mm, f/5 Newtonian

Then a disk of thin black styrene board is placed on top of the polystyrene disk
Using the Celestron Omni XLT 150

This has been done here with the Celestron Omni XLT 150
Finally, to prevent any light from getting around the disks of polystyrene and styrene board, a further disk of black styrene board is placed up to the edge of the base. Despite the presence of the black, rubberised sheet often placed on the back of the mirror by the manufacturer, light can sometimes leak into the back of the scope, particularly if light from a street light falls on the bottom of the scope.
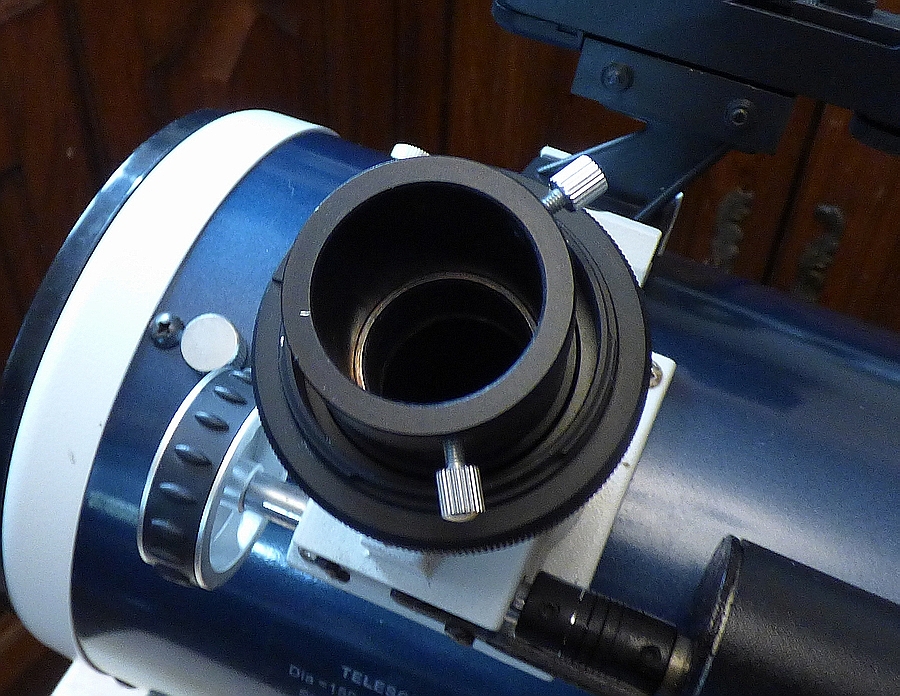
Celestron Omni XLT 150

Diagram of the insulating and light-excluding components

Fitting of DSLR and eyepiece adaptors
Attaching and correctly aligning a DSLR direct camera attachment directly to the focuser and optionally modifying the focuser to hold a filter, such as a light-pollution filter in front of the DSLR. It is worthwhile spending the time slackening off the three grub screws and turning the DSLR connector so that the camera will be aligned the desired way when attached. Once the camera alignment is satisfactory, the grub screws can be tightened.
I have written about this previously HERE in more detail.
DSLR connector screwed in place

Light-pollution or other filter screwed in place

Eyepiece adaptor screwed on after the filter

Eyepiece holder without a filter
Fitting a motor focuser to the scope.
A motor focuser prevents the scope from being vibrated during focusing, and is particularly important if a dual-speed focuser is not fitted.
Here a standard Skywatcher motor focuser is fitted after removing one of the focusing knobs.

Preventing the Tube from slipping through the rings when the tube is turned in the rings

Four adhesive felt strips were attached to the tube (two on one side of the tube and two on the other side). When the tube has to be turned, for example, when the mount has had to reverse after passing through the meridian. Without the felt strips in place, the tube can slip downwards through the rings and change the balance of the whole system. With the felt strips in place, the tube rotates easily without slipping.
Using the modified Celestron Omni XLT 150, f/5 Newtonian with AstroDMx Capture for Linux to capture the globular cluster M13
A ZWO ASI178MC camera was placed at the Newtonian focus of a Celestron Omni XLT 150, f/5 Newtonian mounted on a Celestron AVX EQ, GOTO mount.
AstroDMx Capture for Linux was used to capture 40 x 30s exposures of M13 with matching dark-frames.
Screenshot of AstroDMx Capture for Linux capturing data on M13

The best 38 frames were dark-frame corrected and stacked in Deep Sky Stacker, and post-processed in The Gimp 2.10 and Neat Image.
M13

AstroDMx Capture for Windows, macOS or Linux (Including Raspberry Pi) can be downloaded freely here: