In the previous article we looked at the correction of vignetting by the use of flat-fields and we explained exactly how flat-fields work.
In this article we shall look at a situation where there is no vignetting but where problems arise that require correction by flat-fields. Flat-fields are required if there is dirt or dust on the sensor or optical window in front of the sensor and when cleaning fails to cure the problem.
AstroDMx Capture has the facility to capture flat-fields and to apply the master flat-field in real-time which makes the process of capturing clean data more efficient and pleasant.
For this experiment we used an old DMK 21AU04.AS camera that has accumulated dust and dirt on the sensor over the years, and which we now use for flat-field testing.
To capture flat-fields we place a variable illuminated panel on the front of the telescope.
The panel is of the sort sold by Amazon as a Light box tracing drawing board. The device has even illumination across the panel and variable brightness control which facilitates setting the optimal illumination for the flat-fields.
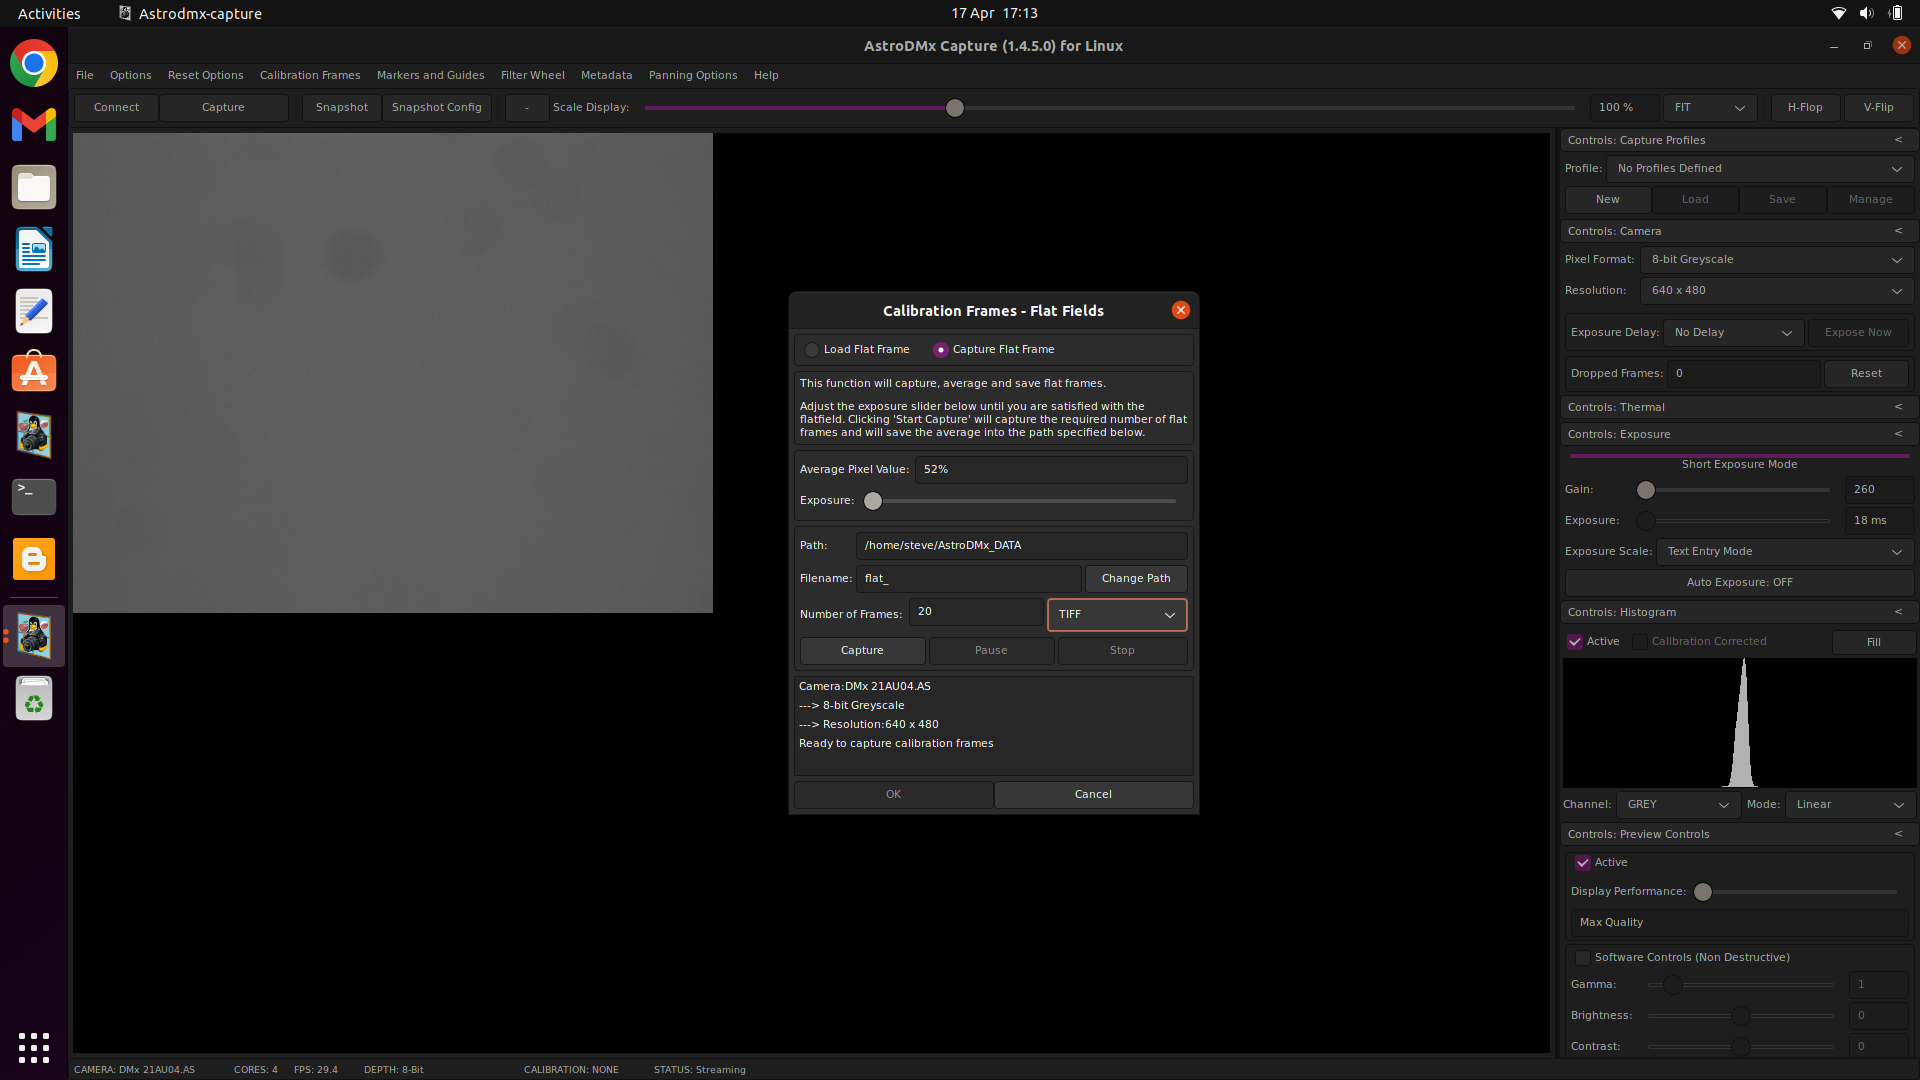
AstroDMx Capture for Linux was used to capture 20 flat fields by the built-in flat-field capture routine which captured the flat-fields and produced a Master Flat-field.
Click on an image to get a closer view
Screenshot of AstroDMx Capture for Linux setting up to capture Flats
Capturing 20 TIFF file flat-fields. The exposure giving 52% maximum in the histogram
About 50-60% maximum is generally the correct exposure for flat-fields
Capture of the flat-fields is complete
Setting up to load the Master Flat that has been created
Loading the Master-Flat
This is the Master Flat that will be applied

Master Flat is loaded but flat-field calibration not yet activated
Activating the flat-field calibration
When the flat-field is applied to the data stream
When the flat-field is NOT applied to the data stream
Using flat-field calibration in a Solar imaging session
An APO 66mm f/5.5 refractor fitted with a Baader solar filter was used with AstroDMx Capture for Linux to image an area of the Sun using a DMK 21AU04.AS camera.

Screenshot of the imaging session imaging the Sun in White light with AstroDMx Capture
The dust spots can be seen all over the image of the Sun
Screenshot showing the same view when the Master Flat is applied in real time in AstroDMx Capture
It can be seen that the dust spots have all disappeared, removed by the flat-field.
AstroDMx Capture for Linux captured a 2500 frame SER file of the Sun. The best 80% of the images were stacked in Autostakkert! The resulting image was wavelet processed in Registax 5.1 and post-processed in the Gimp 2.10.
Resulting image of part of the solar disk
The image was then oriented correctly and colourised slightly in the Gimp 2.10
The large sunspot groups AR2993 and AR2994 can be seen appearing around the limb of the Sun. Smaller sunspots and some granulation and plage can also be seen, but the blemishes due to dust on the sensor are gone.
AstroDMx Capture can be downloaded HERE.
AstroDMx Capture is available for Windows, macOS, Linux including Raspberry Pi OS and ChromeOS.