Friday 24 December 2021

A further seasonal Feature release of AstroDMx Capture for all platforms.

A further seasonal Feature release of AstroDMx Capture for all platforms.


This release brings on board a new planetary and guide camera from SVBONY, the SV905C.


The SB905C features a USB2.0 data connection via a Type C interface.

This new camera is now implemented in AstroDMx Capture for Windows, macOS and the Raspberry Pi.

There are problems with the Linux x86 64 SDK and when this is resolved by SVBONY, the camera will also be implemented in x86 64 Linux.

An issue with the DMX Auto WB has also been resolved in this release, as have issues with UVC cameras in macOS.

AstroDMx Capture can be freely downloaded HERE

Monday 20 December 2021

Christmas Feature Release of AstroDMx Capture for all platforms.Version 1.3.14.0

 Christmas Feature Release of AstroDMx Capture for all platforms. Version 1.3.14.0


Nicola has released a new version of AstroDMx Capture for Windows, macOS and Linux (including the raspberry Pi)

Readers may remember from my previous post entitled ‘Why do they do these things’ That Apple had made changes such that astronomical image capture software was unable to connect to UVC cameras in macOS 12, Monterey. Cameras impacted were devices such as the SV105 and the SV205. 

Nicola has made a solution to this problem and this is available in the new feature release of AstroDMx Capture for macOS. The number of reports that came in from users indicates that there is a significant number of macOS users of these UVC cameras. Thankfully Nicola has solved this problem. It is to be hoped that Apple will undo the damage they have caused if it was unintentional. If however, it was intentional then at least Nicola’s solution circumvents the problem, The problem only affects UVC cameras and does not affect proper USB astronomical cameras, or even enhanced UVC astronomical cameras such as DMK, DFK and DBK cameras from The Imaging source. However, UVC webcams and devices like the SV105 and SV205 are affected.

The problem associated with the Pi cameras for Raspberry Pi computers running the Bullseye version of Raspberry Pi OS has not been resolved, and can’t be resolved until suitable support in terms of software and documentation are provided. However, the Raspberry Pi Foundation are keeping the Buster version of Raspberry Pi OS as a legacy version for people to use until the Pi Camera problems are resolved.

Notable changes in version 1.3.14.0

  • Added: Touptek Camera Support -- all thermal controls implemented including dew heater control.
  • Added: Omegon Pro Camera support for all thermal controls implemented including dew heater control.
  • Added: Bresser Camera support.
  • Added: Dew heater setting to capture log.
  • Added: Fan control setting to capture log.
  • Added: Target sensor temperature setting to capture log.
  • Added: Function to capture and save Bias frames along with the Master Bias frame.
  • Added: DMx white balance imaging dimming compensation.
  • Changed: Complete rewrite of the Capture log.
  • Changed: Master calibration frame now called Master instead of Average.
  • Changed: DMx White Balance value is now written to the capture log.
  • Fixed: Frame calibration output format is now remembered when stopping a capture run.
  • Fixed: SVBONY and Altair exposure cancellation bug.
  • Fixed: UVC camera connection problems caused by MacOS Monterey.
  • Updated: Altair SDK.
  • Updated: ZWO SDK.
  • Updated: QHY SDK.
  • Updated: Atik SDK.
  • Updated: Lumenera SDK.
  • Updated: wxWidgets from 3.1.4 to 3.1.5
  • Updated: Other important dependencies.
  • General improvements to exposure cancellation. Exposures can now be cancelled from the Capture dialog without a frame being saved.
  • Internal code changes to facilitate ongoing maintenance.
  • AstroDMx is now versioned with four digits. The first digit is the major version number, the second is the minor version number, the third is the micro version number and the last digit represents if AstroDMx is an internal build or a release. A zero means release, higher than zero means an internal or test build.
  • Changes to the Windows build environment.
  • Support for older CPUs that don't have SSE3 or SSSE3 instruction-sets on Linux has been reintroduced, however, performance (frame rates) may be limited on such CPUs.
  • Changes for DSLR usage on Windows has had to be implemented. Details can be found HERE
  • Bug fixes.

Testing the Bresser implementation 

The Bresser GPCMOS01200KPF camera implementation was tested by mounting the camera at the focus of a William Optics Zenithstar 66mm, f/5.5 ED, Apochromatic Doublet refractor. The scope was mounted on a Skywatcher Star Discovery, Synscan AZ mount.

AstroDMx Capture for Windows was used to capture two overlapping, 2,500 frame, RGB24 SER files of areas to encompass all of the 98.5% Moon. 

Click on an image to get a closer view.

Screenshot of AstroDMx Capture saving SER files of lunar data


The best 85% of frames in the SER files were stacked in Autostakkert! The two resulting panes were stitched together with Microsoft ICE and wavelet processed in Registax 6. The resulting image of the 98.5% Moon was post processed in the Gimp 2.10.

98.5% Moon


98.5% Moon, chroma enhanced to reveal mineralogical variation on the surface of the Moon


The following night a Skymax 127 Maksutov was mounted on a Celestron AVX GOTO mount and the Bresser GPCMOS01200KPF camera was placed at the focus of the telescope.

2,500 frame, RGB24 SER files were captured of various regions of the 99.9% Moon using AstroDMx Capture for Windows.

Screenshot of AstroDMx Capture for Windows saving SER data of the Kepler region of the Moon.


The best 85% of the frames in the SER files were stacked in Autostakkert! The resulting images were wavelet processed in Registax 6 and Post Processed in the Gimp 2.10.

The Reiner Gamma, Kepler and Copernicus panes were stitched together in Microsoft ICE and post-processed in the Gimp 2.10.

Reiner Gamma, Kepler and Copernicus region of the Moon


Reiner Gamma, Kepler and Copernicus region chroma enhanced to reveal mineralogical variation in the surface of the Moon.


Other regions of the Moon were similarly imaged and processed.

Screenshot of AstroDMx Capture for Windows capturing SER data of the Palus Somni region of the Moon with a Bresser GPCMOS01200KPF camera


Palus Somni region

Palus Somni region chroma enhanced

Plato, Sinus Iridum region

Plato, Sinus Iridum region chroma enhanced

Tycho region

Tycho region chroma enhanced

A number of cameras have been brought on board with this release of AstroDMx Capture. The tests of the Bresser camera here demonstrated the camera's abilities as a planetary, solar system imager, and also showed the colour capture of the camera to produce good results.

AstroDMx Capture can be downloaded here: https://www.astrodmx-capture.org.uk


Sunday 12 December 2021

It never Rains but it Pours

It never Rains but it Pours

This proverbial expression originated in 1726 in an article by Jonathan Swift and Alexander Pope where they wrote in  “Prose Miscellanies”, "It Cannot Rain But It Pours"; the progenitor of our title here.

They were referring to the observation that when one bad thing happens, it often seems that other bad things accompany it.

It is sometimes tempting to believe that the cluster of bad events is somehow functionally related. Whilst this can sometimes be true, it is also true that clusters of events (bad or otherwise) can just be the result of randomness. This is illustrated in the diagram below:

One hundred random Y coordinates were plotted against random X coordinates.


Being randomly placed, there is absolutely no relationship between the position of any point and any other point. In fact, a good definition of random positioning of points or events (in space, time or both) is that the position of one point (or event) is not influenced by, nor does it influence, the position of any other point (or event).

Examining the scatter diagram, we can see that if we consider, for example, the two equal areas marked in yellow that are quite close to each other, one contains no points (events) and the other contains six points (events). The cluster of six points (events) has absolutely no significance just as the area containing no points (events) has no significance; they are simply random. There are other clusters and gaps in the diagram that are also not significant and are also just the natural result of randomness.

I mention all of this because I have recently written an article entitled “Why do they do these things” in which I describe actions taken by Apple and the Raspberry Pi Foundation that have repercussions for UVC cameras (Apple) and Pi Cameras (Pi Foundation), that impact astronomical imagers; that can be read HERE.

It never rains but it pours, because I now also have to report that in Distributions of Linux with a kernel of 5.15 (and above at the moment), for example Fedora Linux, changes in the userland interface in the kernel means that the way that applications detect the names of UVC cameras has changed, and not for the better.

Linux has always assigned UVC cameras on the USB bus as Video4Linux video capture device numbers. However, it has always been possible to discover the names of these cameras, to facilitate the choosing of the correct camera to connect to the imaging program. With the release of the latest kernel as mentioned above, it is no longer straightforward for imaging programs to identify cameras by their names. They now have to be identified by their Video4Linux video capture device numbers.

This is the way that a DMK 21AU04.AS camera (which is an enhanced UVC camera) is presented to the user in the Windows (which does not have the problem) version of AstroDMx Capture:

This is also the way that the same camera appears in Linux with lower kernel numbers than 1.15.

However with kernel number 5.15 this is how it appears in Linux:


This is not a deal breaker, but it is an inconvenience that at the moment affects all Linux imaging software including AstroDMx Capture for Linux.

It is entirely possible that this situation will be rectified in the future, but at the moment there is no sign of this. It may be that Nicola will produce a solution for this problem whether or not it is rectified by the Linux kernel developers.

These three events that affect UVC cameras and also Pi Cameras are an unrelated cluster, but they add simultaneously to the problems of capture software developers. They are random events, but for developers, it seems that It Never Rains but it Pours!


Wednesday 8 December 2021

Apple/Pi: Why do they do these things?


Why do they do these things?

In the space of a month or so, Apple and the Raspberry Pi Foundation have done two things that can potentially impact astronomical imagers.

Apple

In the latest version of macOS 12 Monterey, Apple has done something that they possibly regard as an enhancement to security; however, it has not been thought through properly, or maybe it has… Apple has always had the attitude that they know best and that they will tell their users what they should have and need.

That is all well and good unless you happen to be an astronomer and you wish to use a UVC device to capture images or video of astronomical objects. 

A UVC device is a USB Video Class device. These are devices capable of streaming video over USB,  like webcams, digital camcorders, transcoders, analog video converters and still-image cameras. Many of these devices are used by astronomers as devices to capture astronomical data.

Cameras such as the SV105 and the SV205 are sold as astronomy cameras and electronic eyepieces though they derive from webcam type devices. However, other, higher-end astronomical imaging devices such as The Imaging Source DMK, DBK, DFK series of cameras however, are also basically, enhanced UVC devices.

What Apple have done in the latest version of macOS 12 Monterey, is to remove permissions for applications to access UVC cameras, with the exception of course of apple-included apps such as Photo Booth. It would, of course, be possible to pay Apple money and jump through hoops to free an application from this restriction, but this would never be practical for any astronomy imaging software.

Of course, this policy will make it very difficult for malware to access the built in UVC webcam or attached webcam, because it would not have permission to do so.

Unfortunately, all astronomical imaging software available for imaging with a Monterey Mac is unable to access UVC imaging devices.

Happily this restriction does not apply to astronomical cameras that are not UVC devices.

A result of this is that AstroDMx Capture for macOS will not now support UVC devices. Of course, Nicola will research any possible way around this problem.

If you have a proper astronomy imaging camera such as an SV305, a ZWO an Altair, Bresser, Tuptek etc. or a supported DSLR for example, there will be no problem with using AstroDMx Capture for macOS as usual.


Raspberry Pi

If you are running the Raspberry Pi OS Buster version, then nothing has changed. However, if you have upgraded to the latest Raspberry Pi OS Bullseye version, the Pi cameras will no longer work. Without deprecating the camera system, The Raspberry Pi Foundation has completely changed the way that the Pi Cameras work. In fact, this leaves everyone, including the Python users, without support. 

This is a strange and atypical behaviour for the Pi Foundation, who, hitherto have gone to pains to ensure back compatibility. They have produced a completely new API depending on libcamera libraries. This means that things will have to be re-written from scratch. 

The Pi Foundation’s attitude is that for the moment, the Buster version of Raspberry Pi OS is still available as a legacy version and one can use that version if one wishes one’s Pi camera programs to work. 

However, the Bullseye version is here with its new way of doing things and until decent API documentation is produced, the Pi cameras are going to be in trouble.

A result is that for the moment, AstroDMx Capture for the Raspberry Pi will no longer support the Pi cameras unless the Buster legacy OS version is used. This will be work for the future.


Thursday 2 December 2021

M42/43 with an LeNhance filter, AstroDMx Capture for Windows and an Atik 314 OSC

M42/43 with an LeNhance filter

An f/5.5, 80mm, ED refractor was mounted on a Celestron AVX GOTO mount. The mount was pulse auto-guided with PHD2 using an SV165 guide-scope and an SV305 as the guide camera.

An Atik 314E OSC camera was fited with an Optalong LeNhance dual-band narrowband filter and was placed at the focus of the refractor. This filter excludes all wavelengths but H-alpha, H-beta and Olll.

AstroDMx Capture for Windows, running on a Windows 11 laptop, was used to capture 15 x 5min FITS exposures of the Orion Nebula along with Bias frames and matching dark frames.

Screenshot of AstroDMx Capture capturing 5 minute exposures. The preview was set to 150% and the non-destructive16-bit brightness was set to x2 to facilitate viewing the data being captured.


Screenshot with the same settings except the 16-bit brightness control has not been increased.

This illusstrates another mechanism for brightening the preview of the object being imaged to make it more visible. Note that the Trapezium region of the nebula appears less burnt out because the extra brightness has not been imposed on the preview. It must always be remembered that the preview of the captured images is not intended to show how the final image will apear after post processing, it is intended simply to show that the object has been located and that data are being captured.

The images were stacked in Deep Sky Stacker and separately in Affinity Photo and post processed in the Gimp, FastStone and Topaz Sharpen AI.

Final image of M42/43


Full Size


Saturday 6 November 2021

AstroDMx Capture in a Chromebook via Crouton

In recent months I have written a number of articles about using AstroDMx Capture in a Crostini Linux virtual machine on a Chromebook. The Crostini Linux environment is now stable on Chromebooks. We have shown that it is easy to set up Linux under Crostini and to install a number of important Linux programs for astronomical imaging. We have also shown how to install the Windows compatibility layer Wine so that we can run Windows programs such as Autostakkert! And Registax on a Chromebook.

Crostini

Installing AstroDMx Capture for Chrome OS on the Crostini virtual Linux container allows us to capture images and movies. There are, however, limitations: 

One limitation is that responsiveness is slow, but the program is still very usable. The slow responsiveness is not surprising considering the fact that Chromebooks are, in general, low powered computers with little RAM and Storage, and with low end processors. On top of this, the Linux environment is running inside a virtual machine running in Chrome OS. All of these facts lead to performance penalties. Of course, there are some Chromebooks now available with much higher all round specifications and coming at commensurately higher prices. No doubt the software will be more responsive on these machines. 

Another limitation is that the only cameras that we have found to work properly in the Crostini virtual Linux environment on Chromebooks have been the SVBONY SV305 family of CMOS astronomy cameras. It is not immediately obvious why these cameras work well and others do not. Possibly it is due to the adherence to standards, but the reason could lie elsewhere. The fact remains that at the time of writing, cameras have not been implemented by Google in Crostini. The cameras to which I am referring to are UVC cameras, and most astronomy cameras are not UVC devices.

Crouton

For several years there has been a different way of running Linux on a Chromebook. This system is called Crouton.

Crouton was originally created by Google employee David Schneider. When you use Crouton, you're actually just running one operating system: Linux. However, you are running two environments with Chrome OS.

Crouton stands for Chromium OS Universal Chroot Environment

Crouton is a set of scripts that form a Chrome OS  chroot generator.

What's a chroot?

Chroot stands for Change root. The chroot call originated in Unix 7 in 1979 so it is not a new concept. Unlike Crostini, a chroot is not a virtualisation system.

However, like virtualisation, a chroot provides the guest OS (In this case Debian Linux) with its own, isolated file system to run in, allowing applications to run natively in a different environment from the host OS. Unlike virtualisation, you are not booting a second OS; instead, Debian Linux is running using the Chromium OS system and kernel and effectively uses the Chrome browser as its X-server as a GUI for the running application. The benefit to this is that there is no speed penalty since everything is run natively, and you don’t use lots of RAM to boot two operating systems at the same time.

To visualise this we must be aware that the Chrome OS has its own file system with its own root. It is, basically, an operating system with a Linux kernel and using the Chrome browser as its desktop environment. 

Crouton sets up another totally isolated file system with its own root on the computer and installs Debian Linux  into it. This Debian does not have its own kernel, it uses the Linux kernel of Chrome OS. The chroot changes the root to the Debian OS and it is within this system that programs are installed and run natively, without the performance penalties associated with virtualisation.

We have set up Crouton on a Lenovo Chromebook with an AMD A6 processor, 4GB RAM and 64BG of eMMC storage; a fairly modest Chromebook.

We installed AstroDMx Capture for Linux into the Debian system and were able to run it natively with no performance penalties.

There are three limitations that are not too important at the moment:

First, it is not possible to take a screenshot that includes the preview screen of AStroDMx Capture due to the way it is rendered by the Crouton system.

Second, it is important NOT to try to close the software in the usual way by clicking on the cross at the top right of the display. In fact, this is NOT a control to close down AStroDMx Capture; it is a control to close down the Chrome browser in which AstroDMx Capture is being displayed. It is necessary to close the software via the file menu.

Third, we have found that the QHY series of cameras will not work with the Crouton system. QHY cameras have to have their firmware uploaded each time they are started, and it is probably this process that is currently inhibiting the use of these cameras. Nonetheless, Crouton allows the use of many cameras that are just not possible to use under Crostini.

This is a work in process and it is not considered that these three  limitations are important at the moment

Unlike with the Crostini virtualisation system, we are not limited to using the SVBONY SV305 series of cameras, and in the current test we used a Touptek Toupcam GPCMOS01200KPF camera. 

Testing AstroDMx Capture for Linux using Crouton

An f/5.5, 80mm, ED Ekinox Eklipse refractor was mounted on a Celestron AVX mount and a Touptek Toupcam GPCMOS01200KPF camera was placed at the focus.

A Lenovo Chromebook with an AMD A6 processor was used running a Crouton chroot with Debian Linux, a way of running Linux on a Chromebook that does not involve the Crostini virtualisation system.

AstroDMx Capture for Linux was run natively in the chroot and was used to capture 60 x 15s exposures of M15 using the RGB48, 16-bit format along with matching dark frames.

The data collected were processed on a separate computer as this was simply a test of AstroDMx Capture with Crouton. However, it would be possible to install all of the software required to do the stacking and post-processing if this was to be a system that would be used for imaging on a regular basis.

Equipment used


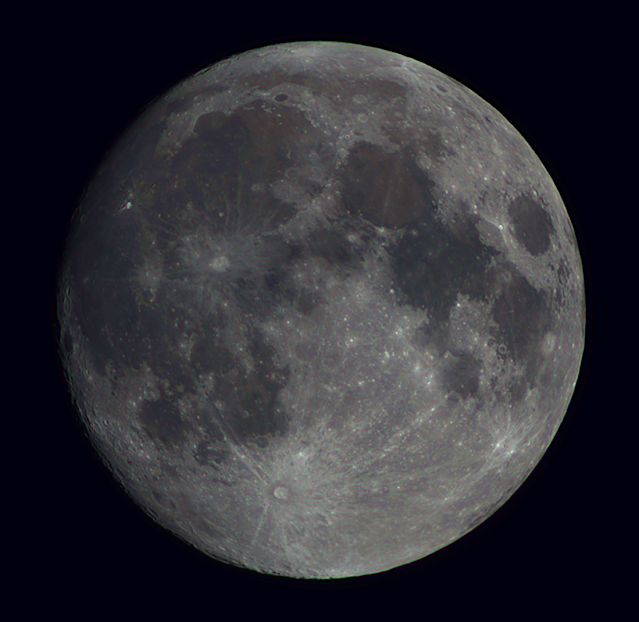
Final image of the globular cluster M15


To set up Crouton on a Chromebook, you have to do a Powerwash and set the Chromebook in Developer mode. It is therefore important to back up any files you may have stored locally. Developer mode is less secure than the normal mode and Chrome OS reminds you of this when you turn on the computer by making some beeping sounds. (These can be avoided by pressing ctrl and d during power on). However, remember, that you are working with Linux which is pretty secure in its own right, and you are doing this in order to get more out of your Chromebook and use it to run AstroDMx Capture for Linux natively. Moreover, if you don’t invoke Crouton, you still have the full functionality of your Chromebook albeit in the slightly less secure Developer mode. 


Monday 18 October 2021

Implementing Touptek cameras in AstroDMx Capture

Nicola is in the process of implementing Touptek cameras in AstroDMx Capture for all platforms. This implementation will be part of the next release of AstroDMx Capture.

We tested a TOUPCAM GPCMOS0200KPF camera fitted with an SVBONY UV/IR cut filter.

A skymax 127, modified for motor-focus, was mounted on a Celestron AVX mount. The TOUPCAM GPCMOS0200KPF was placed at the focus.

AstroDMx Capture for Linux was used to capture 5000-frame SER files in RGB24 of selected regions of the 92.2% waxing Moon. The imaging was done through high, thin clouds, which was far from ideal, but was adequate for these tests.

Click on an image to get a closer view

Equipment used


Screenshot of AstroDMx Capture for Linux capturing data on the Tycho region of the Moon


The best 25% of the images in the SER files were stacked in Autostakkert!, wavelet processed in Registax 6 and post-processed in the Gimp 2.10.

Final image of the Tycho region

Craters Tycho, Schiller and Clavius are all very clear.

Screenshot of AstroDMx Capture capturing a 5000-frame SER file on the Sinus Iridum, Mare Imbrium region of the Moon


Final image of the Sinus Iridum, Mare Imbrium region

Sinus Iridum, Mare Imbrium, The Alpine valley, Craters Plato, Aristillus, Autolycus and Archimedes are all visible in this image.

Final image of the Copernicus, Kepler region of the Moon


Final image of the Gassendi region of the Moon


Final image of the Mare Serenitatis region of the Moon


In conclusion, the Touptek TOUPCAM GPCMOS0200KPF camera worked well with AstroDMx Capture.

Thursday 14 October 2021

RGB48 and a new DMxWB Auto white balance function in AstroDMx Capture

Testing the new DMx WB Auto white balance function in AstroDMx Capture.

This improved version of the DMx Auto WB function with automatic brightness compensation will be in the next release of AstroDMx Capture for all platforms, as will the 16-bit format RGB48 for cameras that offer it, such as Altair and Touptek cameras.

When capturing RAW data with cameras such as Altair and Touptek, The preview and captured images have a green tint as we have mentioned previously. To some extent, this can also happen with Atik colour cameras.

Altair describe this as normal and what would be expected when capturing true RAW data. The green tint can be removed in post processing.

However, as we have pointed out previously, sometimes the preview image is especially important, for example, for outreach work. Moreover, if one is doing live-stacking by combining AstroDMx Capture with DSS Live, it would be desirable to have white balanced data being live-stacked.

Nicola has solved this problem in two ways.

  1. Implementation of RGB48 capture. RGB48 is a 16-bit colour format for which there is a white balance control as there is in RGB24, the 8-bit format. The RGB48 format is generally not available in other capture software, and is not available for many camera types.
  2. Implementation of DMx Auto WB for RAW16 and RAW8 captures which works with Fully debayered data. The DMx Auto WB can be turned on or off for the preview and it can also be turned on or off for saving.

RGB48 for a camera such as an Altair or a Touptek can be selected when the camera is connected.


The format can also be changed from within the program when it is running.

This mode has a one touch white balance.

Demonstrating the DMx Auto WB function

We used an Altair GP-CAM 225C camera at the focus of a Skymax127 that was mounted on a Star Discovery AZ mount. Using AstroDMx Capture for Linux, a 2000-frame SER file was captured of the Moon, which during the current lunation, is extremely low and was only just visible over the mountain opposite our site. As a consequence, seeing was very poor due to the low altitude of the Moon and the heat rising off the mountain. Nevertheless, conditions were good enough to perform a test.

Animation showing AstroDMx Capture streaming lunar data with the DMx Auto WB turned on and off


It can be seen that when the DMx Auto WB is on, the image loses its green tint and retains its brightness because the Brightness Compensation is turned on. Also, when the DMx Auto WB was on we set it to apply to save data.

AstroDMx Capture for Linux capturing lunar data as a 2000-frame SER file


Final image of the Posidonius, Hercules, Atlas, Mare Serenitatis region of the Moon


A closer look at the DMx Auto WB function

We focused a refractor fitted with an Altair GP-CAM 225C on the top of an electricity transformer pole across the valley, using RAW16 with AstroDMx Capture for Linux


There are three images in this animation.

  1. DMx Auto WB OFF (This shows a green tint)
  2. DMx Auto WB ON (Just for the display)
  3. DMx Auto WB ON (For display and applied to saved data)

When the DMx Auto WB is on, the Brightness compensation is turned on. If this is turned off, the white-balanced image will be dimmer than the un-white-balanced image.

The histogram shows the histogram of the data to be saved and is shown in closeup in the following image.


From Left to Right:

  1. DMx Auto WB OFF
  2. DMx Auto WB ON but not applied to saved data
  3. DMx Auto WB ON and applied to saved data.

The DMx Auto WB function is there for the imager to use or not, and if it is used, it can be applied to the saved data as well as the preview, or it can just be applied to the preview.


Monday 4 October 2021

AstroDMx Capture maintenance release Version 1.2.6

Nicola has released an AstroDMx Capture maintenance release Version 1.2.6

This release addresses a bug and makes two improvements.

Mutatis mutandis


  • Fixed: SVBONY SV305 gain/exposure bug
  • AstroDMx's custom white balance function can now be applied in a non-destructive way. That is, applied just to the preview screen and leaving the saved data unchanged; or it can be applied to the saved data.
  • Atik Fast Preview is now automatically disabled during capture


Tuesday 28 September 2021

Feature release of AstroDMx Capture for all platforms Version 1.2.4

Nicola has released a feature release of AstroDMx Capture for all platforms Version 1.2.4.

Mutatis mutandis

Version 1.2.4


There are a number of significant changes in this version of AstroDMx Capture 1.2.4

  • Added: Fan control for ZWO cameras
  • Added: Dew heater control for ZWO cameras
  • Added: Dew heater control for Altair cameras
  • Added: Trigger mode for Altair cameras
  • Added: RGB48 16 bit pixel format for Altair cameras
  • Added: Black level value to FITS metadata
  • Added: Bayer pattern value to FITS
  • Added: Altair support on Raspberry PI 32 and 64 bit
  • Major refactor to allow arbitrary length exposures when the camera's exposure units operate in microseconds
  • Fixed: Bug associated with some ZWO cameras when operating in long exposure mode
  • Fixed: Bug associated with AVI's on Windows
  • Updated: ZWO SDK
  • Updated: QHY SDK
  • Updated: SVBONY SDK
  • Updated: ZWO Filterwheel SDK
  • System Information dialog has been updated
  • Improved the debugging output
  • The USB speed parameter is now automatically reduced to the minimum when operating in long exposure mode
  • Other bug fixes and improvements

RGB48 16 bit format

Most astronomical cameras offer 8 bit RAW, 16 bit RAW (from 12, 14 or 16 bit ADCs), sometimes 8 bit mono (for a colour camera) and RGB24, which is an 8 bit format (8 bits per colour channel).

There are, however, some cameras such as the Altair cameras, that also offer RGB48. This is a 16 bit format (16 bits per colour channel). As with 16 bit RAW, RGB48 data can come from 12, 14 or 16 bit ADCs), the image data are put into a 16 bit image container. In the case of AstroDMx Capture, the 16 bit image containers can be FITS, TIFF, PNG or SER files.


In addition to Gain, Black Level and Exposure, the RGB48 format has access to all of the controls that the RGB24 has, for example, Gamma, Brightness, Contrast, Hue, Saturation, Colour Temp, Colour Tint, and One Touch white balance.


It could be argued that these kinds of adjustments can be made in post-processing, which is true. However, it is quite satisfying to have a preview image that more closely resembles the final image.

Being a 16 bit format the preview images are controlled by the 16 bit display controls and also the non-destructive display controls which are all designed to make the 16 bit images visible in preview.


Tuesday 21 September 2021

The Moon with a Chromebook, AstroDMx Capture for Chrome OS and an SV305M Pro camera.

A Skywatcher Star Discovery 150mm, f/5 Newtonian was mounted on a Star Discovery AZ GOTO mount and an SVBONY SV305M Pro was placed at the Newtonian focus.

The Star Discovery scope and mount used


A Lenovo Chromebook S345 with 4GB RAM and a 64GB eMMC drive and an AMD A6 CPU was used for capturing lunar data. The Chromebook was running Crostini with Linux and had installed all of the software needed to capture and process the data.

AstroDMx Capture for Chrome OS was used for capturing. It should be noted that at the time of writing, the only cameras that will work are the SVBONY SV305 series of cameras. At this stage we don’t know whether it will become possible to use other makes of camera in Chrome OS like this, or indeed, whether future updates of Chrome OS might break its present capabilities.

The software installed in the Crostini Linux container includes:

  • AstroDMx Capture for Chrome OS (native Linux)
  • Wine, Windows compatibility layer (native Linux)
  • Autostakkert! 2 for stacking (using Wine)
  • IRIS for wavelet processing (using Wine)
  • The Gimp 2.10 for post-processing (native Linux)
  • Hugin Panorama Creator for stitching image panes together (native Linux)

AstroDMx Capture for Chrome OS was used to capture 1000-frame SER files of three, overlapping regions of the Moon covering the terminator side of the 98.5% waxing Moon, but not the whole lunar disk.

Click on an image to get a closer view

AstroDMx Capture for Chrome OS capturing a SER file of the Plato/Sinus Iridum region of the Moon.


Final image of the Plato/Sinus Iridum region


AstroDMx Capture for Chrome OS capturing a SER file of the Copernicus/Kepler region of the Moon.


Final image of the Copernicus/Kepler region


AstroDMx Capture for Chrome OS capturing a SER file of the Tycho region of the Moon.


Final image of the Tycho region


Hugin Panorama Creator was used to align and stitch the three panes of the terminator side of the Moon into a mosaic.


This is another demonstration that a Chromebook with Crostini Linux is capable of capturing and processing astronomical images using an SVBONY SV305 series camera and AstroDMx Capture for Chrome OS.